Time to read: 4 min
Inspiration
It all started back in 1995, when I listened to the song Da Funk by Daft Punk. As a European, I had a lot of exposure to Daft Punk music, and after Discovery (2001), it became shall we say…an obsession. 🙂
I stumbled upon this YouTube video on how to make a Daft Punk helmet a while back, bought all the materials, but sadly never got around to making it.
…and then I joined Fictiv! With easy access to 3D printers, of course the first thing I wanted to print was (surprise, surprise) the helmet of Thomas Bangalter.
Here’s how I did it.
Step 1: Digital files
I downloaded my files from thingiverse. I used the v1.5 version, and I’d say it might actually be a bit too big, especially in the jaw area. That said, the size offered me more space to install the battery case.
Step 2: 3D printing
I printed all the files on a Makerbot Replicator 2, and in order to ensure smooth part surfaces, I chose to orient them standing. This meant more printing time and less sanding time.

Step 3: Welding rehearsal
In order to see what the helmet would look like (and because I was too excited to wait for the welding step), I put all the parts together with zip ties, marking the different parts with a Sharpie + tape.

Step 4: Actual welding
I decided to weld the parts and not use screws as the original design suggests. My reasoning was that welding would allow me to have a smoother and sturdier helmet with no extra weight.
Because I had very limited experience with welding, I decided to first weld the dome of the helmet, which was the easiest, using a soldering iron at 300 degrees Fahrenheit.

After that, I went ahead and welded the rest of the helmet.


Step 5: Mid-project selfie

Step 6: Surface finishing
In order to give the helmet a smooth texture, I used XTC 3D epoxy resin.
Instructions come on every bottle, and it’s easy to use. Just be sure to use a mask when mixing, as the 2 mixed materials start reacting immediately and produce fumes.


After the XTC-3D dried, I initially used sand paper, but the XTC-3D was too hard, so I decided to use a dremel to get rid of the biggest bumps.

Step 7: Applying primer
After sanding down the helmet, I applied a gray spray-painted primer.
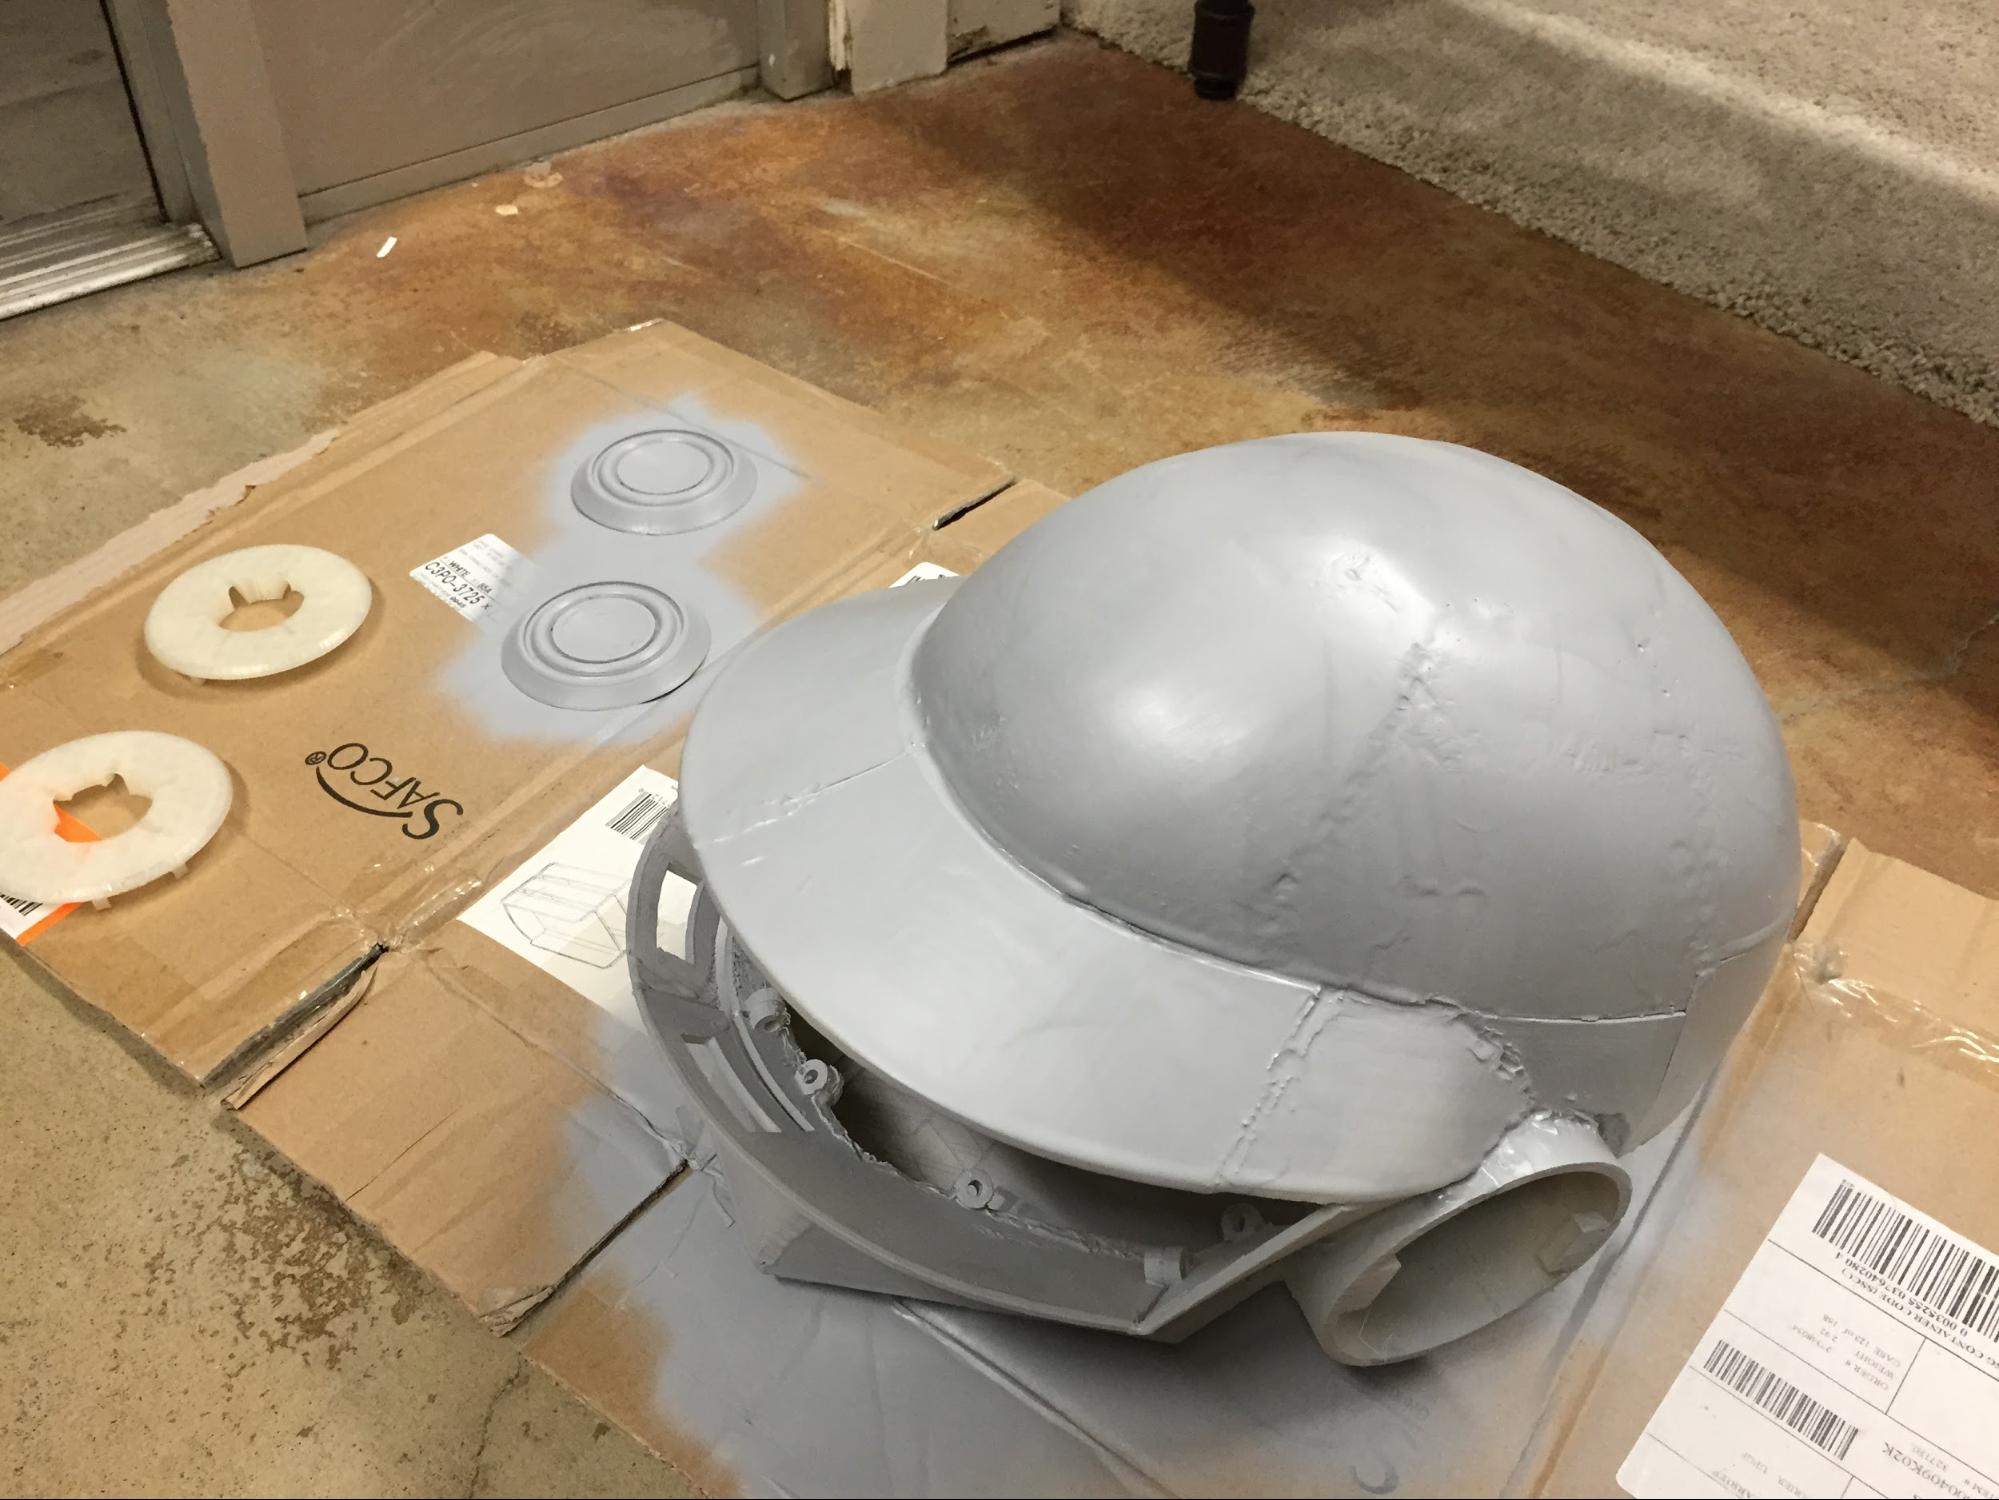
Step 8: Applying bondo
After the primer, I used a simple bondo you can find in any color shop.
Instructions are on the can and pretty straightforward.

Step 9: Drying the bondo
In order to save time, I put the helmet with the wet bondo in front of a fan. Waiting time: 30min.

Step 10: Sanding like there’s no tomorrow
Mask and safety glasses needed.
Patience absolutely needed.
Time of sanding: 3 hours.
Sandpaper used: Fandeli Grit 100.
Beer used: Ballast Point Sculpin.

Step 11: More primer
After hours of sanding, I applied another coat of the primer.

Step 12: Add foam for head protection
The trick here is to check in front of the mirror how much and what thickness foam you need for each side. This will determine where the helmet sits on your head, so it’s very important.
Glue gun used: Surebonder. You only need 5-6 points of glue per foam part.

Step 13: Adding EL Wire
Time to glue EL WIRE on the helmet to add some WOW effect at night (while listening to Daft Punk, of course).
This is the EL WIRE I used. I chose this particular one since I wanted short wires (5 ft each), multiple colors, and only one battery case.
I only put a drop of glue every couple of inches here, so not much needed.

Step 14: Add Daft Punk pyramid logo
After Daft Punk’s 2006/2007 tour, the pyramid light scheme became a trademark of that era for the band, so I had to include it.

Finished helmet
Here it is!

And here it is in the dark.
Lessons learned
This was a learning process for me, and there are a few things I’d do differently the second time around:
- Don’t use XTC 3D on some parts (the dome, in this case). It will create a bump all around the finished part (the base of the dome, in this case) which will have to be sanded later.
- When welding, estimate the parts dimensions. Some bars could help.
- When I was gluing all the black parts of the EL WIRE inside the chin of the helmet, the white EL WIRE cable was cut, due to the tension the glue gun created. Don’t do this.
Now, go listen to some Daft Punk!