At Fictiv, we’re seeking to uncover, decodify, and share how physical products are made—what we like to call the DNA of hardware development. As part of that mission (and our hardware geekery) we’re starting a new series to reveal in a more tangible way the magic behind a wide variety of amazing hardware products.
As soon as we saw Sphero was partnering with Disney to create a BB-8 droid, we knew it would be the perfect launch for the series.
So on Force Friday, we (with difficulty!) got our hands on one of these little guys and took a look inside to discover the magic that makes up this adorable droid.
Here’s a deep look into each of the BB-8 components, and for even more detail, check out our Facebook album with all the outtake photos.

Packaging

The packaging here is pretty standard for many consumer electronics today. It uses single cardboard with a lithography offset wrap, which creates crisp images and a uniform feel that looks nice and shiny for Disney and Apple Store displays.


Overall, this is a great unboxing experience, pulling off the top and lifting the panel to reveal the product.


They use a high density foam here that appears to be either molded or stacked as several layers. This helps to protect the product during shipping and to present a really high-quality finish.

We also noticed the handle on the top of the box, which is required for hanging products in lots of different retail stores, including Apple. We also love the creativity here, noticing they used half the Sphero logo as the handle. Great detail!

This is the clear protective thermoformed shell used to protect the product and ensure there’s no damage to the surface during shipping. This type of feature shows the company spent a lot of time designing the packaging around shipping, which isn’t surprising for a gen 3 product like this.
We see lots of young companies forget about packaging all together until the last minute and then inevitably problems arise moving products in shipping containers across seas or by ground to customers. The main takeaway here is, don’t let your product get damaged in the last mile before reaching your customer, after all your hard work!

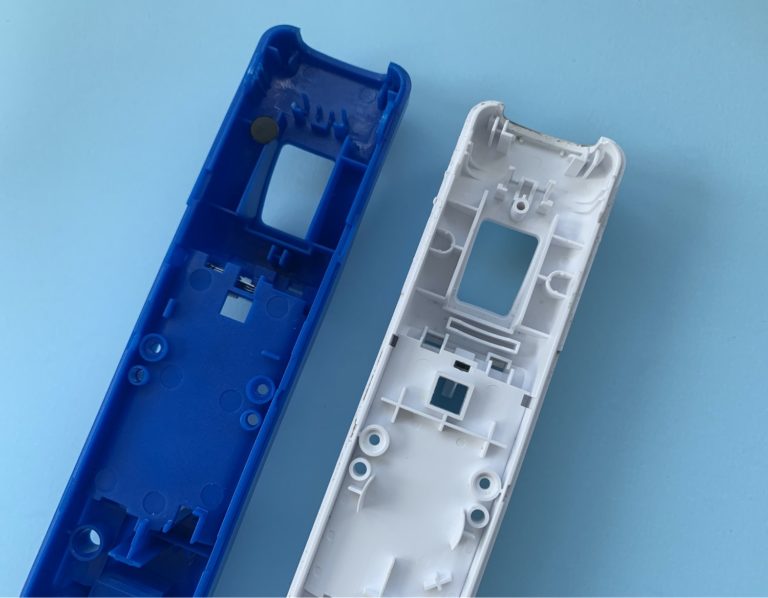
So here they are, the three main components of the BB-8 Sphero: The charging dock, the Sphero ball, and the top head piece. Let’s take a look at each of these main components to see what’s going on.
Charging Dock

The first thing we notice with the inductive charging dock is there are 4 different colors used (orange, white, light grey, and dark grey) and lots of components assembled together. This means there is a lot of mechanical design going on here, where pieces need to fit together in addition to providing a visually appealing dock.


Flipping over the dock, we can see 4 rubber pads have been applied to the bottom, so it doesn’t slide around. In addition to this utility, the rubber pads also help to hide the assembly and screw marks, which is a very common trick in consumer electronics. Pads like these allows you to design thicker bosses on the interior that will inevitably leave sink marks. Remember < 50% wall-thickness will leave clean surfaces and > 50% = sink marks :(.
Additionally, notice the required certification labels located on the bottom here, covered by a clear packaging label to protect the printed information from being scratched during shipping.

On the edge of the dock, we see a USB port, which means the PCB needs to mount flush with all the mechanicals inside, since there will be lots of force applied when plugging and unplugging the dock.

Pulling off the grey panel, we see the dock uses 4 bosses as a mounting point for all the colors and plastics around it; we can see 7 different pieces of plastic here that interlock for a tight fit, all around these bosses which act as anchor points.
We also notice that these interlocking pieces hold in the PCB underneath, which is a good use of space and prevents components from rattling around.
From an assembly perspective, this really simplifies things: The orange piece snaps to the white bottom disk; then PCBs get put in place; then the large white disk is used to sandwich everything together; and finally, the 4 light grey pieces are put in place, and the dark gray disk is screwed on top. Woohoo for DFA!


On the white center disk is a simple push button mechanism used to turn the dock on and off. From the outside, it looks pretty slick and custom, but taking a closer look inside (right image), we realize it simply uses a foam circular disk to retract the button in and out and an off-the-shelf push button. Ahh, the magic of hardware (and hardware + Disney + Star Wars)!
Looking inside, we can also see that this seemingly magical push button is just a single injection molded part, foam disk, and push-button attached to a small breakout board, with a jumper cable back to the main PCB. (We may need to do an entire series on push button mechanisms after this review…)
Consumer electronic parts often have difficulty getting PCBs close to the edge of the housing—breakout boards, like the ones used here, are a great way to tackle this problem. Pros of using this method are that is simplifies the design and dependencies between ME and EE teams, while the cons are that it increases your BOM count, assembly takes more time, and you need to secure each board down mechanically.


On the inside of the grey panel, we see some of the other injection molding imperfections, including different wall thicknesses, bosses the same thickness as walls which add strength but lead to sink marks, ejector pin marks, and gate. These cosmetic imperfections are all intentionally located either on the inside of the component or hidden by the rubber pads.
Also note the lead weights used here to make the product feel more substantial—another common trick used in consumer electronics.


Taking a closer look at the orange and white disks, we notice (and love) the satisfying tactile click of the snap fits used to connect these pieces. This is an example of good DFA (design for assembly), since it requires no screws to hold these pieces together.
Additionally, we notice a small side notch, which gives the impression that this is all one cohesive piece, rather than multiple, giving it a more unified and polished feel.

And you know you’re a hardware nerd when you’re impressed by a single piece of plastic. The simplicity of this white disk accomplishes its task perfectly; while the design looks fancy and the silkscreen on top does a good job of making it seem as such, the part is perfectly designed for a single 2-part mold, with no slides or action required.
This is really good DFM (design for manufacturing) work to make the part cheaper to injection mold with constant wall thicknesses throughout.

Lastly, the final plastic component in the charging dock uses symmetry to injection mold one part that fits in four different places on the charger. Again, this is a very simple part, with no actions or slides required.
Sphero Ball

Next up, the Sphero ball! After a few attempts to open this resilient little sphere with a hammer (fail), we take to the Dremel, as it’s most likely ultrasonic welded.


For the outside design, they most likely used a cosmetic wrap and our guess is a hydrographic wrap (there are lots of great YouTube videos on this).

After pulling the shell apart, we can see it’s made of a 3mm polycarbonate shell—this thing isn’t breaking!

Inside the shell, we can see it has the same interior components as previous Sphero balls (their website actually shows a good exploded view).


Two standard motors are used to direct the driving for each wheel; careful spec work was done here, so no gearbox is needed.

The biggest change in this Sphero ball compared with previous gen products is this spring-loaded mechanism, with a magnet on top designed to keep the adorable head piece on.
Head
Speaking of the adorable head piece, let’s take a look:


It’s a very simple part, really, with essentially just a cute shell and a magnet to keep it on the body. It’s interesting to think that even though the technology behind Sphero already existed in previous products, the addition of this galactic nut has made this particular model the hottest product since Furby.

All brawn, no brains!


P.S. For more detail on the materials and components used to build BB-8, check out the Collaborative Spec Sheet.