-
Capabilities
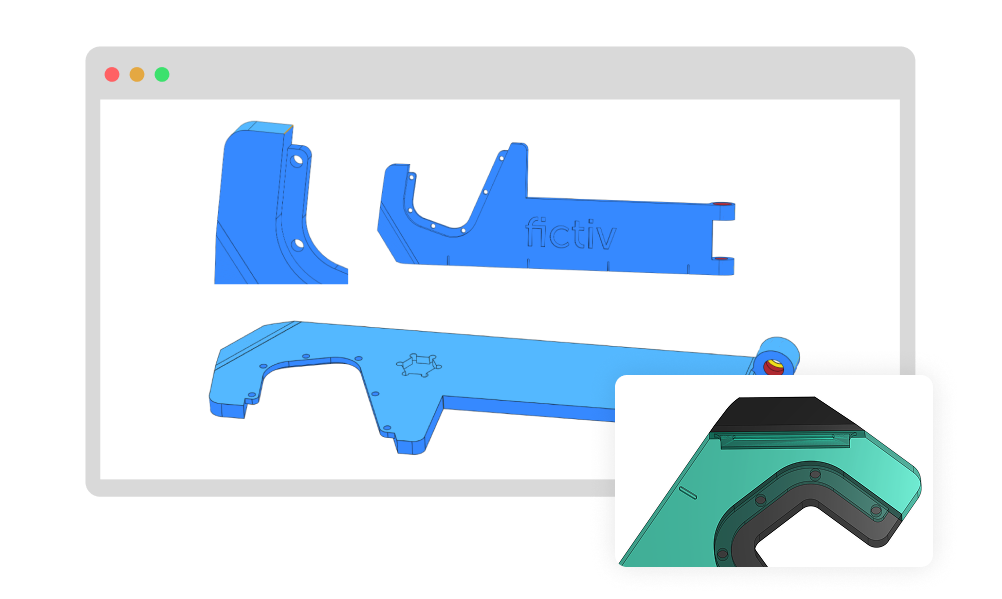
CNC Machining
Tight tolerances and finishing capabilities, as fast as 2 days.
Sheet Metal
Experience the versatility & cost efficiency with flexible application options.
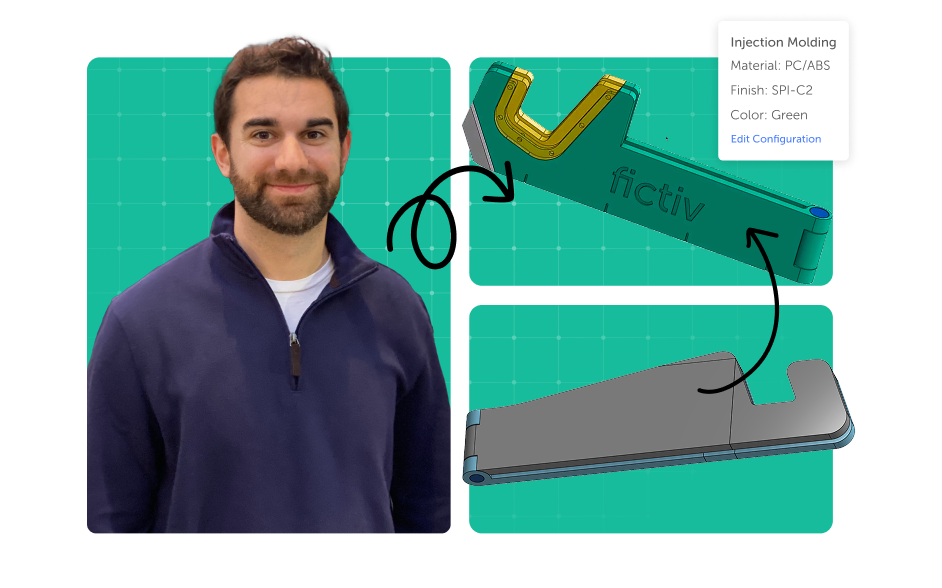
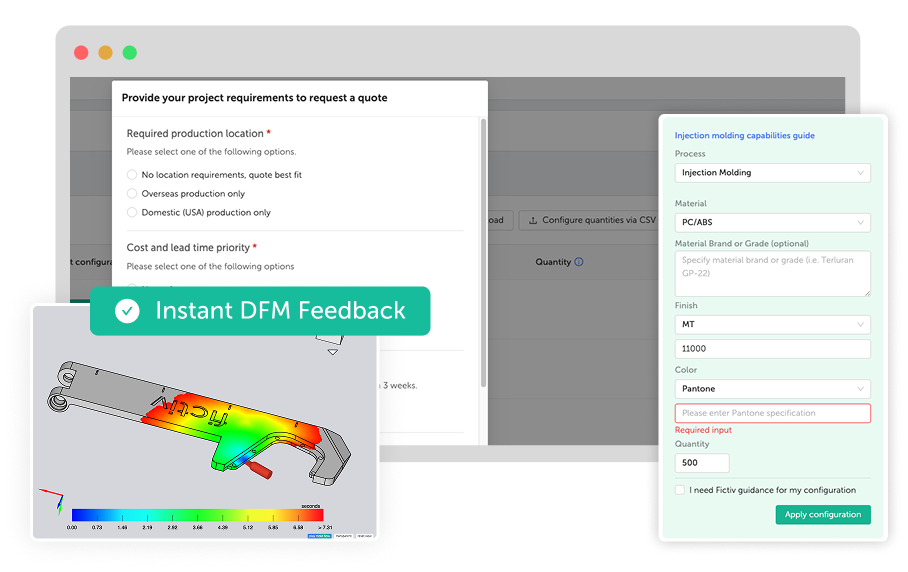
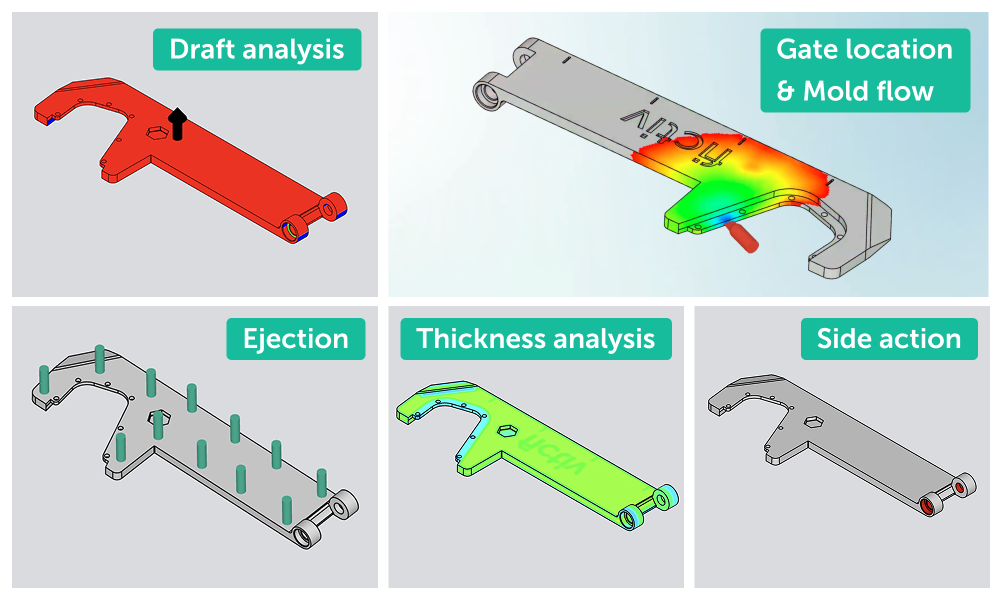
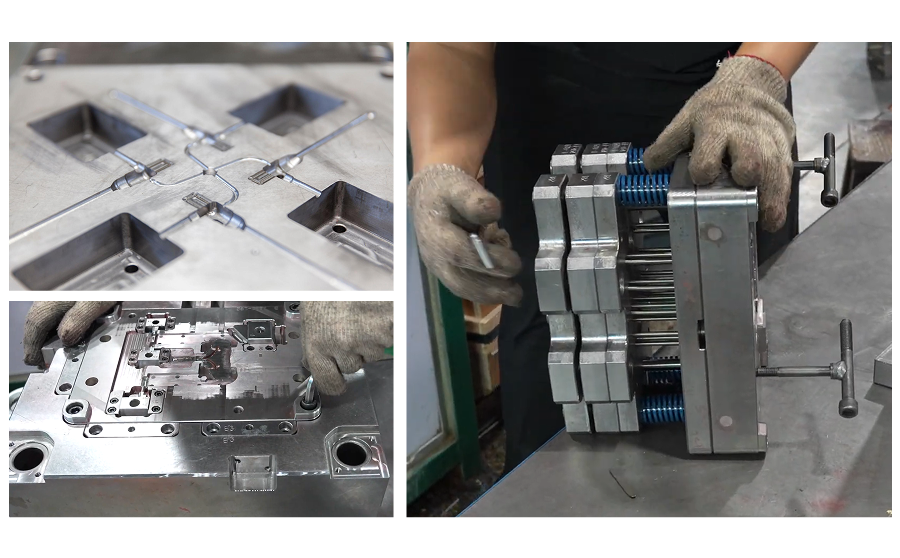
Injection Molding
Production-grade steel tooling, as fast as weeks.
Die Casting
Create high quality custom mechanicals with precision and accuracy.
3D Printing
FDM, SLS, SLA, PolyJet, MJF technologies.
Compression Molding
Experience lower tooling costs with high-quality durable parts.
Urethane Casting
Production quality parts without the tooling investment.
![Out Platform]() Our Platform
Our Platform
Our digital supply chain platform provides high-quality, scalable manufacturing solutions and is built to handle the full product lifecycle.
Learn more -
Solutions
![Whats Next]() Manufacturing
Manufacturing
What's NextJoin thousands of customers who trust Fictiv with their production programs.
Learn more -
Industries
-
Resources
![]()
2025 State of Manufacturing & Supply Chain Report
Download report![]()
![]()
Airvine Scientific Success Story
The manufacturing behind Airvine's wireless Ethernet backbones.
Read case study![]()