Time to read: 4 min
Engineers are always trying to make designs faster, better, cheaper, lighter. Before 3D printing, the only way to create prototypes was through subtractive manufacturing, where a block of material was cut away until only the part or a mold of the part remained. These components could only be produced and assembled one at a time. This prototyping method was slow and, in many cases, very expensive. Creating single part files one at a time using both through subtractive and additive manufacturing methods is still widely used.
However, producing moving assemblies with many articulating components working together has become faster and easier. Here are a few important tips when designing your assembly for 3D printing.
Leave Air Gaps
Always leave negative space or air gaps between components. When designing in 3D CAD, creating geometry in the same area as a separate component is both possible and easy. When the 3D printer receives a file with overlapping geometry, it will print the two or more parts together as if they were one component. That’s not ideal for a real-life, moving assembly with separate components that articulate against one another, so it’s important to check your models to make sure there is negative space between all parts in the assembly.
A good rule of thumb is that the air gaps should be at least double the layer thickness of your choice, which can be specified before the print. This allows the gap to be small enough to be unnoticeable at first glance but large enough to allow the soluble support material that fills the gap during the printing process to be washed away by the bath post-print. One additional note is that 3D printing is bilateral in tolerance (+/- X), whereas other machining operations can be set to unilateral tolerances (+ X, -Y).

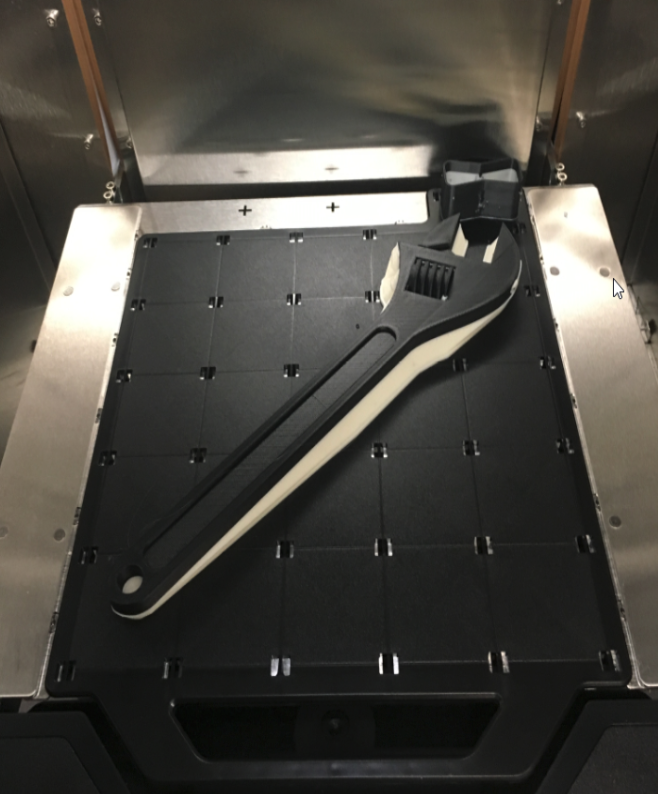
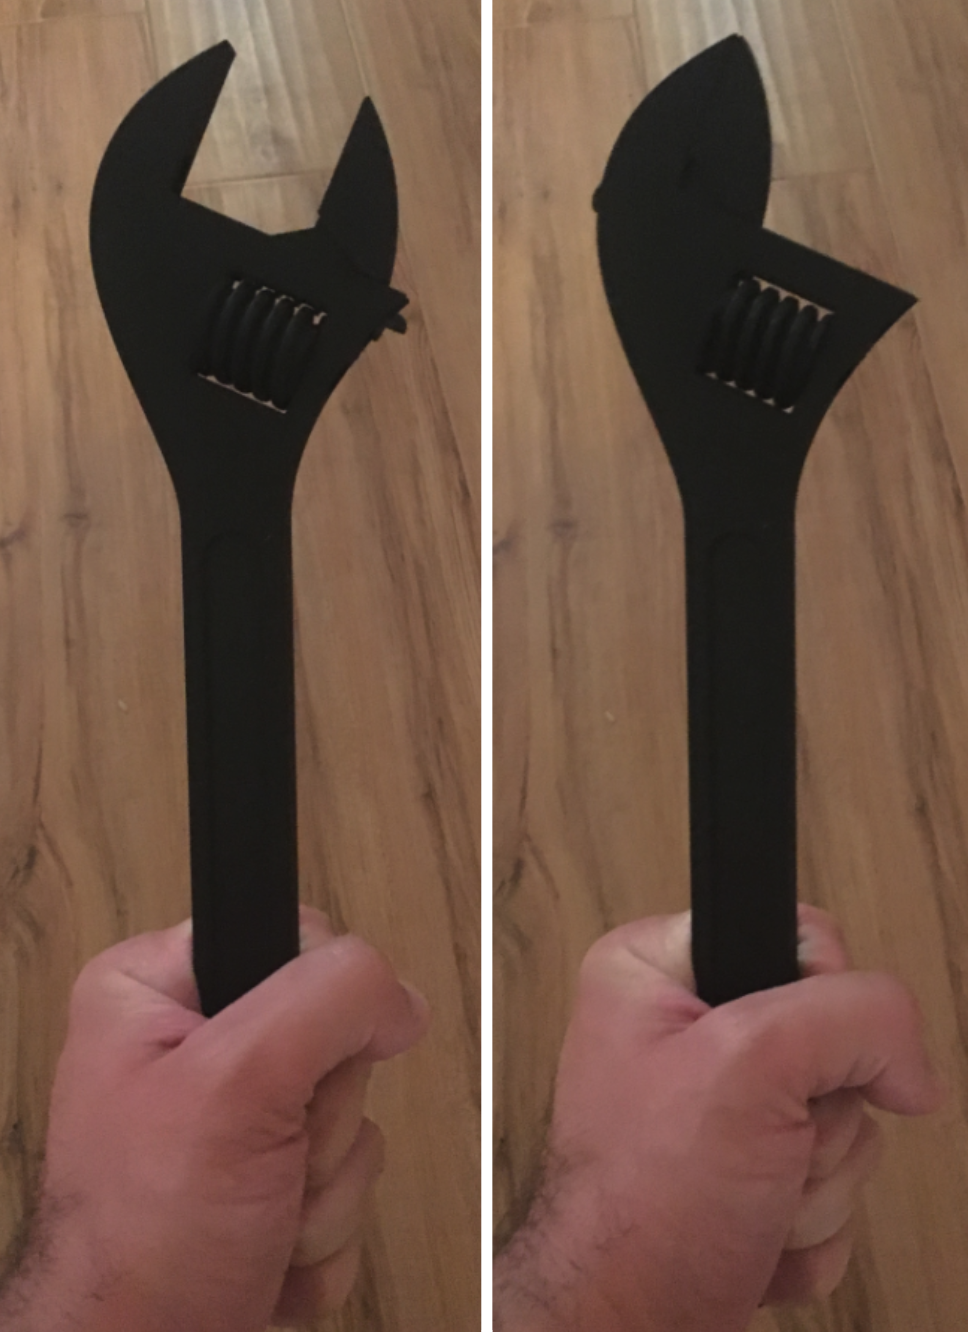
As an example, I chose to model and print an adjustable wrench. I chose a layer thickness of 0.005”, which is the smallest possible option. To leave the appropriate amount of space between parts, I needed at least a 0.01” air gap (0.005” * 2) between all of my adjustable wrench’s component faces. This way, there is no risk at all that the extruded paths of the FDM printer will melt together while printing. One could argue that with all the different possible materials and printing types that are out there, the air gap could increase or decrease from this rule of thumb. While true, using the practice of doubling the air gap compared to the layer thickness of the 3D printed assembly will work as intended in most situations.

Soluble Support Material
For this method to work, using a 3D printer that extrudes not only model material but also compatible soluble support material is necessary. Using only model material will not work as model material will not dissolve in a bath. The support material is necessary because, during the printing process, the air gaps need to be filled with something substantial to keep the components of the print stationery and thus printable.

After the print has finished, it should be placed into a wash bath where the soluble support material can dissolve and wash away. Since the air gaps between components are small, the bath for a fully assembled 3D print can often take longer than for a single component 3D print because the bath can take longer to penetrate. Furthermore, the bath can only dissolve the little bit of material it is touching making the process take even longer. In the case of this 3D printed adjustable wrench, the support material took nine hours to wash away at 85º Celsius.

After the 3D print has been thoroughly washed and only model material is left, gently move the parts around to pry them further apart and generate the desired movement of the assembly. Be gentle at first; too much force, and the more delicate parts of the assembly may snap.

There is one important thing to keep in mind while designing assemblies. Even if you have adequate air gaps between all of the parts in the assembly, if the holes leading out to the water bath are too complicated, the soluble support deep in the model may never come in contact with the solution. The result? The support material in those gaps will not dissolve enough for the components to move, no matter how long the assembly remains in the bath. For this adjustable wrench example, I had to move the knurl and the replacement jaw a lot to finally loosen the remaining support material in the small gaps of the wrench that had not been washed away.
Reduce Friction
While not as vital as the first two points, reducing friction will help in the functionality of the 3D print. When an entire assembly is printed together and is not meant to come apart, the post-print modifications can be severely limited. If you can access all your 3D printed parts after printing, then you can sand and refine until you feel content, making sure everything fits and operates smoothly as you assemble. If, however, you have a component on the inside of an assembly (like a gear) and that has been printed with thick layer lines, it will not have a smooth finish and will produce more friction than compared to a component that has thin layer lines and a smoother finish.

Takeaways
While it’s possible to design and print an assembly with articulating surfaces all in one print job, there are times when it’s better to stick with printing individual components for subsequent assembly. For example, if your separate components are made of different materials and colors and you don’t have a printer that can print using various materials, you will be forced to print them one at a time and assemble them afterward. Other projects have complex features, like intricate channels or large hard-to-reach gaps, which makes the support material difficult to remove. In a case like that, it’s also likely better to print separately and assemble afterward.


