


Time to read: 8 min
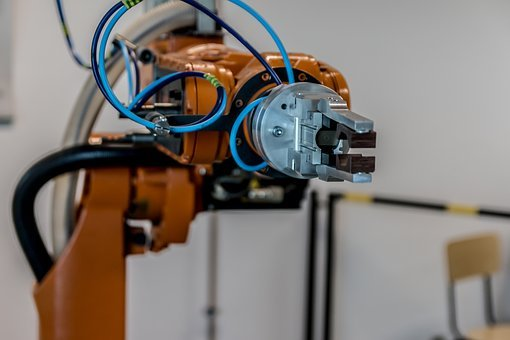
A robot performing parkour was impossible 30 years ago, but now, Boston Dynamic’s Atlas robot can traverse an obstacle course gracefully and precisely. Boston Dynamics uses Atlas as an exercise to unlock the next generation of mobility, perception, and athletic intelligence in robotics.
The Atlas robot is constructed of a beautiful combination of 3D-printed titanium and aluminum parts, but its technological advancements and operation would not be possible without the wire guides threaded through its enclosure design. Even more impressive is the amount of force these wire guides can withstand on a repeated basis.

After facing wiring challenges in my most recent case design, all I can think when I see under Atlas’ shell is, “How does it not crimp wires every time it moves?” Usually a lot of attention is paid to a shell’s external aesthetics, with careful planning of every detail, but wire guides get thrown in at the last minute.
On the inside, there are extensive supports for the electronics that are concerned with ribbing and strength and focus on the mechanics of the movement. Wire guides are often there to keep the mess of cabling out of the way, not to be a creative or beautiful part of most designs.
And that’s a workable approach, though many designs fail to even control the cables. Unruly wires can make it hard to close a case, prevent key components from mating (thereby ruining a good design-for-assembly), and interfere with the internal movement of gears and levers — causing unexpected (and embarrassing) failures in the process.
Clean wire routing and effective cable guides solves all of those problems and can also create beautiful design elements.

Why are Wire Guides Used?
You need to route the wires through the mechanics — that much is obvious. But how? What are the key concerns? The solutions start with examining the failures.
Wire Guides Keep Wires And Cables Away From Mechanical Components
First and foremost, good wire guides play a critical role in keeping electrical wires and data cables away from critical mechanical components — so that both electronics and mechanical components are protected.
Complex robotic arms may move in all six degrees of freedom, and cutting-edge robots can even have twelve degrees of freedom through extending linear actuators and crown-gear rotors. And the wiring must pass through and around these joints with enough slack to achieve full freedom of movement.
Allowing sufficient slack at the right points means keeping distance short in others. If the mechanical assembly moves with the wire attached, said wire must be long enough to allow unrestricted movement. So, your design needs to account for that change.

Wire Guides Provide Strain Relief
This brings us to the second requirement: strain relief. As a mechanical joint moves, it’s easy for a wire threaded through it to be pulled, which will test the strength of the electrical connectors and may create sharp bends. Good wire guides allow slack around the joints, and ensure that any pulling force is borne by a strong mechanical piece rather than delicate soldered or crimped connections.
Especially with RoHS-compliant, lead-free solder, joints are brittle and can withstand only limited strain.

Of course, your design isn’t going to assemble itself (at least not without huge advancements in AI and robotics!), so you also need to consider the people putting your case together. That means considering the order in which components are assembled when designing wire guides. A good wire guide design will direct wires and cables away from joints and connectors and allow for easy assembly.
If you’ve ever tried your hand at reassembling old electronics, you know how frustrating it can be reassembling components with stray wires poking every which way out of the case.

Wire Guides Create Aesthetically Pleasing Assemblies
And aside from practical realities, wire guides add a certain ordered beauty to a project, like the subtle lines of a French formal garden. Steve Jobs was known for such details, having learned from his father at an early age that even hidden details are important. He carried that philosophy into each Apple product, and even had the signatures of the original Macintosh team engraved on every case.
Beauty can seem like an esoteric requirement, but we’ve all experienced how much better everything works when elegance is a project goal.
Types of Wire Guides
There are many common ways to guide wires, but let’s start with the easiest: off the shelf cable guides.
Cable Guide Clips
Cable guide clips are easy to use and cheap, and will guide your wires and cables without causing any pinching. For many projects, these guides provide what you need in the case design and only require that you pay attention to the location of the boss for the screw inside the case. While functional, guide clips are not exactly beautiful, and the additional components add cost and time to assemble.


While you can design your own cable guide clips, options are probably already available for your specific application — so focusing on other design aspects is a better use of your time.
Strain Relief Wire Guides
With many wire guides, strain relief is a major requirement, so it’s a good idea to include a strain-relieving wire guide as the first wire guide point after a connector. The most common strain-relief wire guide creates a double bend, pinching the wire between a post and a horseshoe to create slack at one end, even when there’s tension on the other.

The strain relief wire guide design requires a balance between:
- Not bending the wire too tightly, which can create its own strain, AND
- Creating sufficient friction between the two parts to ensure that the wire won’t slip under tension
For repeated wire bending, you’ll need to limit the bend radius to at least eight times the wire thickness. A minimum bend radius of the wire diameter will generally be sufficient in a design where the wire will only be bent once.

The second critical design consideration is creating sufficient friction to keep the wire in position. Formulas are simple but always require complex interaction between materials — the rule is that the tighter the bends in the wire, the more force it can handle without slipping. Since this cuts directly against our first goal of minimizing strain, best practice is to use the minimum bend radius (one wire thickness) in your design where possible.
Pro-Tip: Round or chamfer all edges of your wire guides to prevent damage to wire and cable coatings during installation.
A third component to consider in your design is the height of the strain relief wire guides. The limiting factor here is the height of your case or enclosure, but you want to maintain a height of at least 10-20% greater than the diameter of the wire you are ‘guiding’.
Thermoplastic Secured Wire Guides
For situations in which the wires will or should be kept in place indefinitely and must stay secure, a heat-formed bond over the top of the wires provides a secure guide with minimal risk of the wire slipping out.

Just take care to ensure the guides will melt together without ruining the wires or wire coatings beneath. To accomplish this, you can add energy directors — areas of thin plastic that allow for faster melting.
Also, compare the melting temperature of the thermoplastic you wish to use as a guide to the melting temperature of the coating surrounding the cable or wire you wish to secure. Make sure the variance between the two is big enough, then set your heat settings so you don’t melt the coating — it’s an excellent time to re-heat your frozen thermodynamics skills!

Snap-In Wire Guides
Ideally, assembly should be as easy as a snap of a finger (groan), and snap-in wire guides have the easiest assembly of any wire guides. No screws or other hardware, no heating, no careful bending, just push the wire through, and it remains fixed.

Snap-in guide design is simple, too. Snap-in guide design, particularly in the context of cantilever snap fit, is straightforward. A snap in this design is essentially a cantilever beam, where the desired deflection matches the depth of the snap. At this level of deflection, it’s important that the maximum strain does not exceed the plastic deformation limit of the material. These critical values can be determined using this simple formula:


Where:
- ∂_max is the depth of the snap, or maximum deflection
- ε_max is the maximum permissible strain for the material (less than 2% for ABS)
- l is the length of the beam from the base to the snap
- h is the thickness of the beam, and
- 0.67 is a constant for the rectangular geometry
So, that’s how you determine the length and height required for the maximum deflection — the maximum deflection for a wire (or bundle of wires) is based on enough depth to allow for the wire to pass through the two cantilevers (half for each, typically).
Clip Wire Guides
Similar to a snap-in design, clip wire guides securely hold wires out of the way of your mechanical components and allow for easy assembly. Even better, these designs are great for ribbon cables in designs that require large numbers of individual cables.
As with strain relief guides, your design should avoid creating crimps in the wire that could compromise mechanical integrity or electrical conductivity.

Zip Ties

The ultimate attachment multitool, the mighty zip tie, will probably join cockroaches and Twinkies as things that will outlast us all. Zip ties are a common solution that’s great for prototyping, but use them with caution. Though strong, zip ties can break if they contact sharp edges. And if the ends aren’t clipped properly, the pieces can jam in mechanical assemblies as easily as the wires they’re meant to guide.
So, use zip ties as wire guides sparingly, and preferably only in prototypes.
Final Design Notes
While any of these methods are better than providing no wire guides at all, some work much better than others when the rubber meets the road, or when your case meets the mechanics. In considering the best type and location of wire guide to use, ask yourself these questions:
- Is there a way to keep the wires near the core components so the case pieces can come off without being attached by wires?
- What direct route can the wires and cables take through the assembly?
- What areas of the mechanical design will be especially likely to pinch cables and wires?
- Where can I save the assembler from needing tools to route the cables?
- How can I make the proper cable route obvious to the assembler?
- How can the cable routing add beauty to the machine?
Main Takeaways
Case design details like wire guides are often seen as inconsequential, hidden parts of grander projects, but the attention to such details is the essence of craftsmanship. It’s what separates designs that consistently function flawlessly from assembly to use from those that will have you fiddling with the screws to maneuver around stray wires for the life of the product.
Your boss may never allow you to add your signature into your design, but I certainly value being able to take pride in both its consistent, smooth function, and its beauty once the case comes off. If you need some help convincing the rest of your team of the importance of these details, tell them it’s what Steve Jobs would do.
If you are in need of custom wire guides for your next project, Fictiv is your ultimate CNC machining service, 3D printing, and injection molding partner. No matter what your production method, our experts will help you refine your designs so that your wiring is tucked neatly away and you get great results.

Sign up for a free account and see how beneficial our manufacturing services and expert guidance can be for you!
