Time to read: 5 min
3D printing, urethane casting, and injection molding: they’re each suited to different stages of the product development and production process, but how do you know when to use each one? A few factors go into this decision: cost, lead time, and quality. In this article, we’ll discuss indirect and direct costs and lead times for an example part, then compare these factors so you can better understand how to reduce your manufacturing costs.
3D Printing
3D printing, a term often used interchangeably with “additive manufacturing,” refers to a variety of processes. These include:
- Fused deposition modeling (FDM)
- Selective laser sintering (SLS)
- Stereolithography (SLA)
- Multi-jet fusion (MJF)
- Polyjet
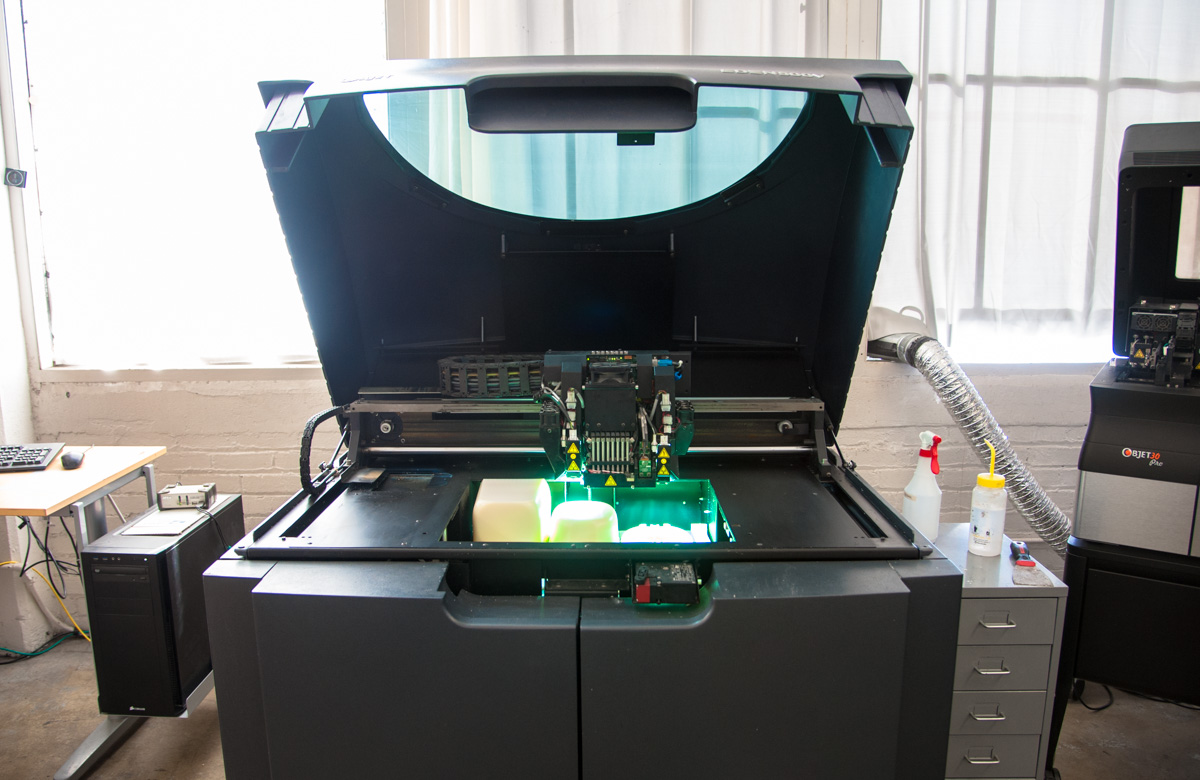
Each process has its advantages and disadvantages, but all provide quick ways to make parts.
Once a 3D design is ready to go, a part can be made in a matter of hours. This makes 3D printing ideal for early prototyping and proof of concept work. And many engineers start making 3D printed prototypes while the designs are being finalized — which helps minimize potentially costly engineering changes when moving to higher volume production methods. 3D printing can even be used for some functional testing if you use a method like SLS.
However, most 3D printed production runs don’t go beyond 100 parts — both because of the variance from part to part and cost per part at higher quantities.
Urethane Casting
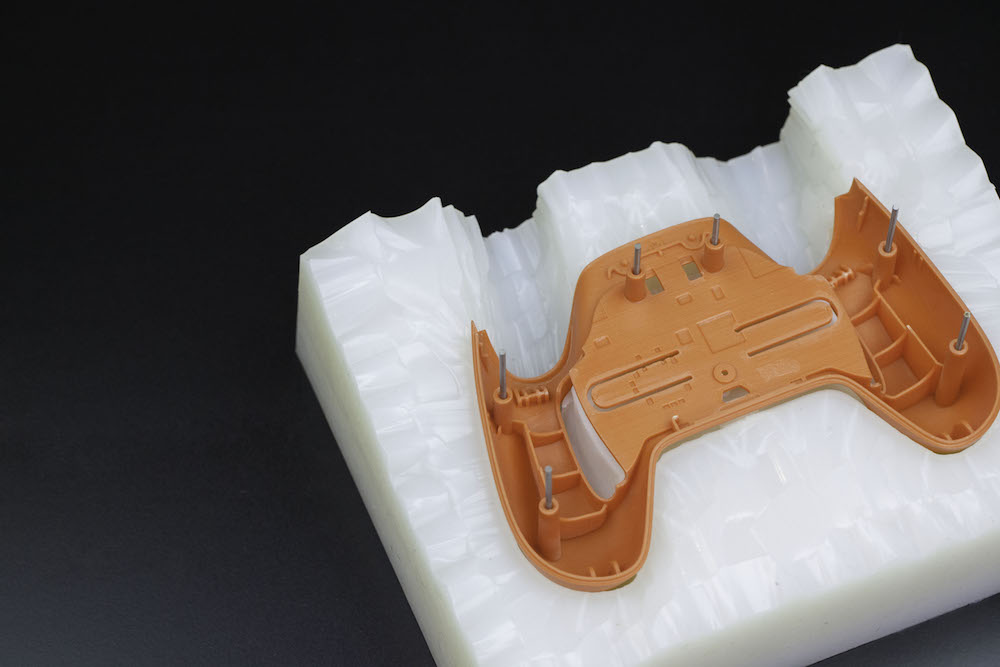
When you do find yourself needing to produce more parts, urethane casting is the logical next step. Urethane casting, also referred to as room temperature vulcanization (RTV) molding, uses silicone molds (derived from 3D printed parts) that cure at room temperature. These molds are filled with a polyurethane material to create the part. The molds are quick to make, and each one can make up to 20 parts. Urethane casting is a good process for producing up to a few hundred parts. Above that number, the expense of creating more master patterns and additional tooling becomes too costly.
Injection molding
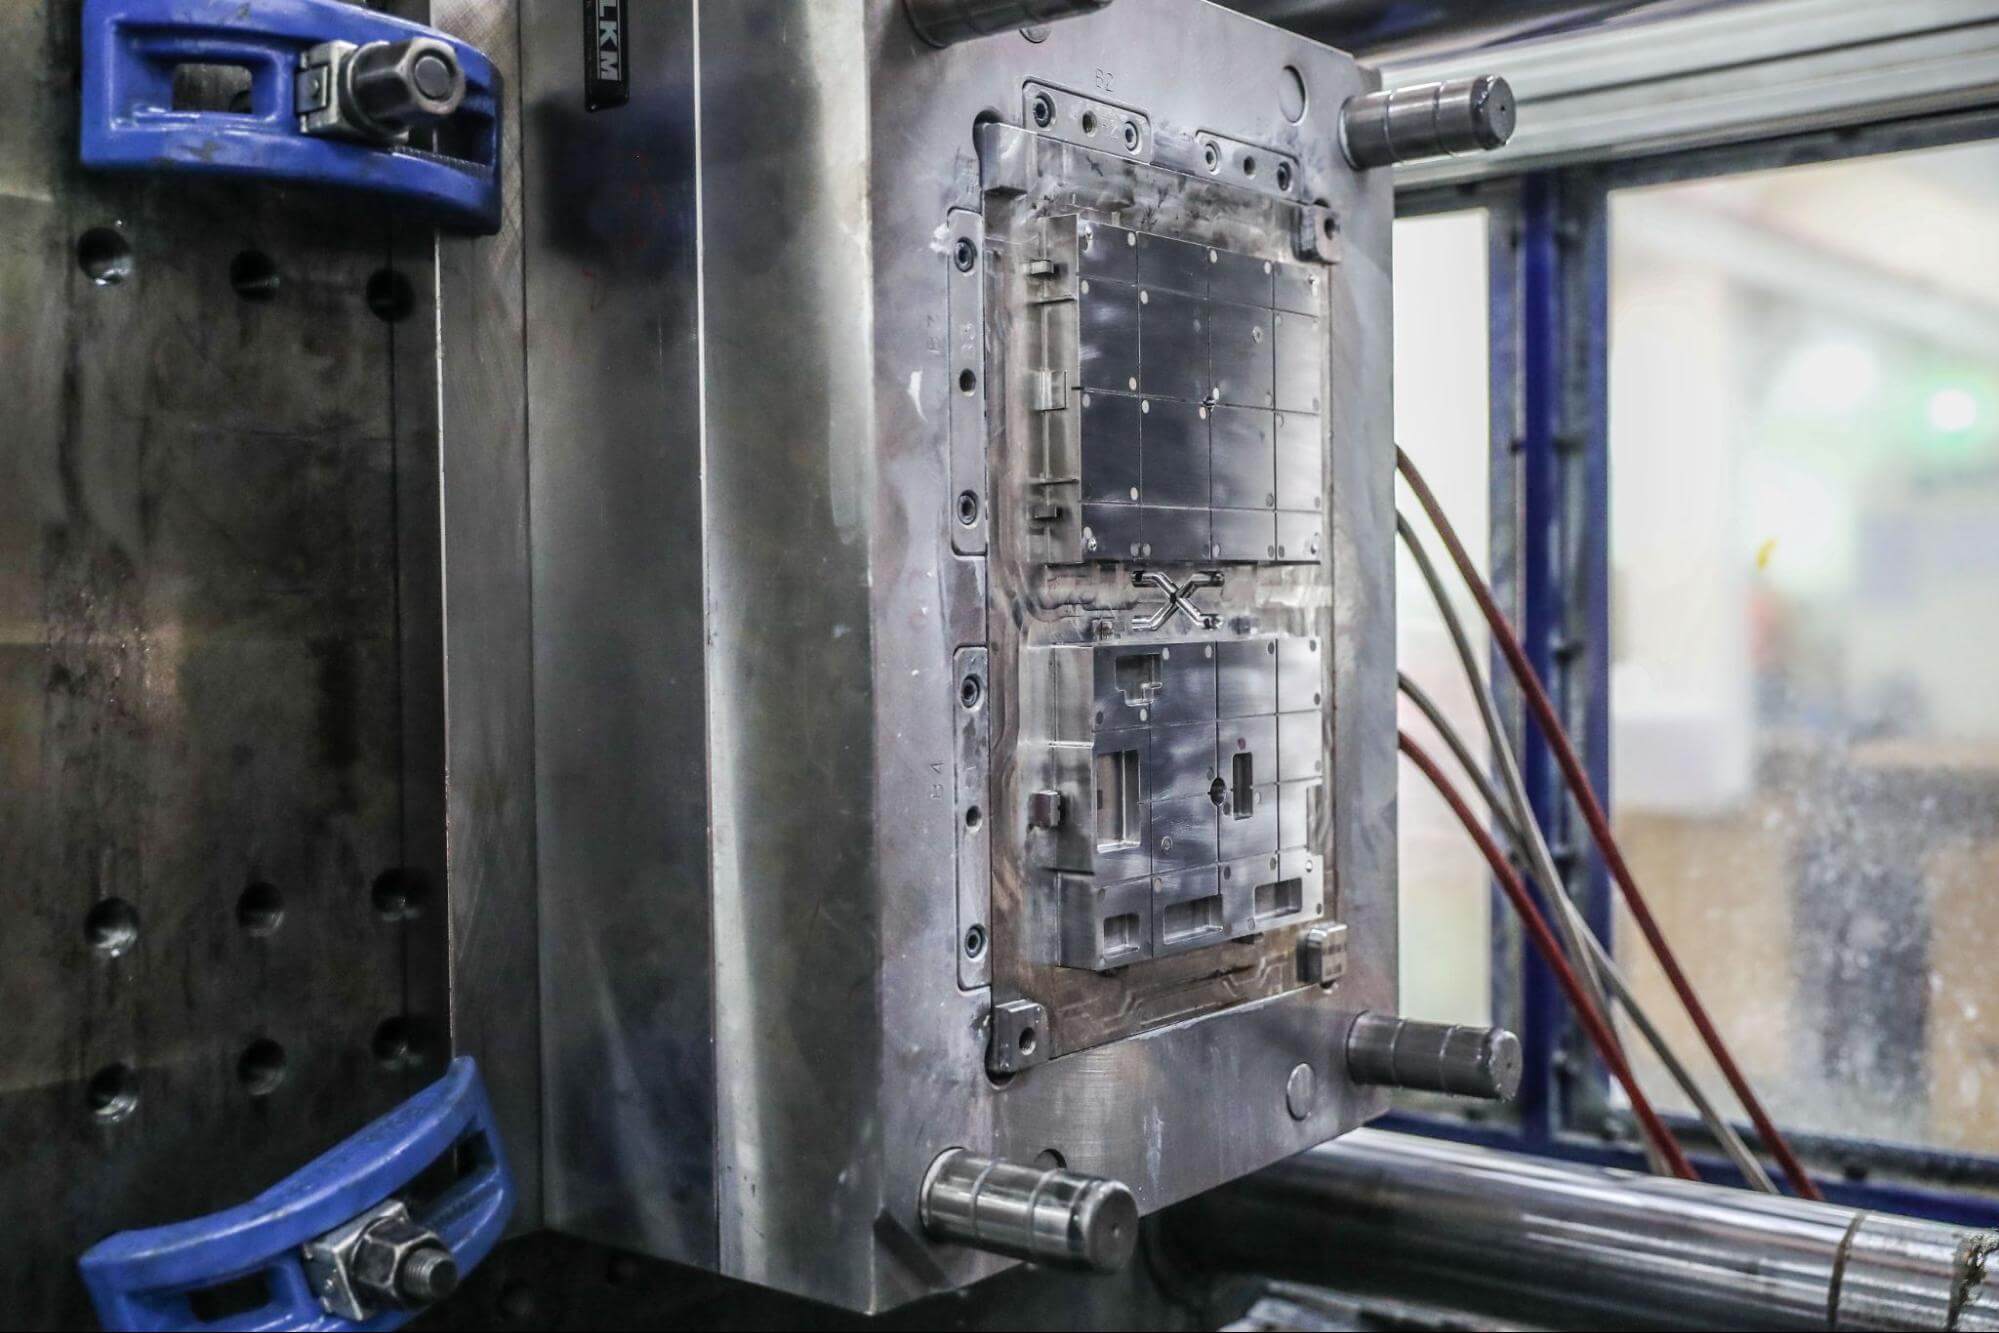
Injection molding is where production takes a bit of a leap in terms of quantities, with many people thinking that it only makes sense to injection mold once you need thousands of parts. While true that it takes longer to get your first parts, as compared to 3D printing, it may make sense to switch to injection molding sooner than you think. Still, you have to design and machine the injection mold, which is often made out of steel. This mold production process adds cost to the design since the steel used to make those molds and the machining required to get it right isn’t cheap.
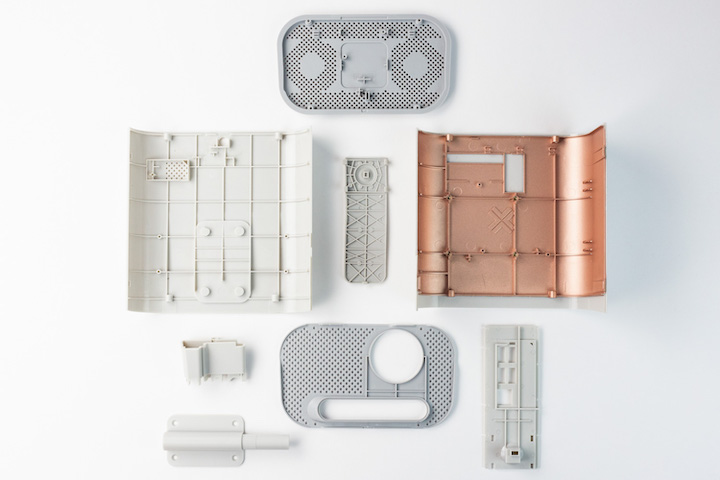
However, at a certain point, switching to injection molding becomes worth it, with parts being manufactured in seconds by the powerful presses. And one mold can be used to make up to one million parts! You definitely wouldn’t want to be waiting around to 3D print one million parts.
So, when does it actually make sense to start injection molding? Let’s take a look at some numbers and find out.
Comparison of Costs
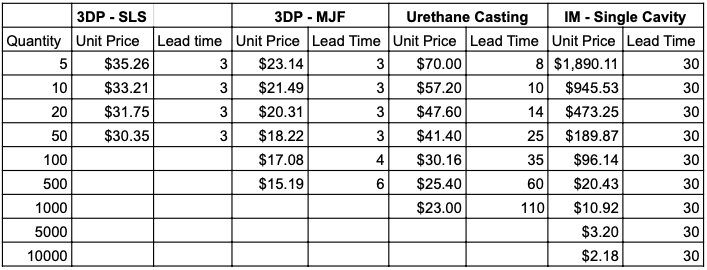
In this table, we’re looking at these three different manufacturing methods and comparing the volume, unit cost, and time. At low volumes, 3D printing makes the most sense, with the fastest lead time and lowest price per part.
3D Printing Costs
You can see that although the unit cost for 3D printed parts decreases slightly as quantity increases, it levels off after a certain point. 3D printing lead time also begins to increase after about 50 parts, and the cost depends heavily on the type of 3D printing process. MJF (multijet fusion) continues decreasing in unit price until quantities hit 500 units, and the lead time is still only 6 days.
When 3D printing there are also other considerations besides cost and lead time. A common goal when making a larger quantity of parts is to do testing on these parts. MJF uses Nylon, which may have very different properties from the plastic material you’ll ultimately use. And for testing, it makes sense to use the same material as the final product.
Urethane casting provides a wider range of materials and higher structural integrity than 3D printing, making it worth the extra few dollars per part to ensure your testing is accurate.
Urethane Casting Costs
Once you begin urethane casting, it quickly becomes more cost-effective to move on to injection molding. The unit cost in our example includes the tooling cost, casting cost, and finishing cost. So, a realistic maximum quantity for urethane casting is 300 parts, though, with improvements in injection molding tooling production, it’s most often used to make between 20-100 parts for testing.
Injection molding involves a larger upfront cost to manufacture the mold tooling, but it’s important to remember that cost can quickly be amortized over the large number of parts produced.
Injection Molding Costs
Keep in mind that different companies account for tooling costs differently. Some simply eat this cost upfront, but it’s common to take the total tool life and amortize the cost of the tooling over the production quantity and add it to the unit price.
For example: Tool cost of $10,000 with tool life of 100,000 units. The amortized cost is $10,000 / 100,000 = $0.10, so that $0.10 is added to the unit price.
When looking at our example table, injection molding becomes cost-effective at about 500 parts. Each part is just five dollars more expensive than a 3D printed part, but the quality of the part makes it worth it. Additionally, the part will be made using the final material and production process, so you can gain some important insights early on, and be ready to seamlessly scale production as needed.
The Bottom Line
The biggest takeaway from this exercise is that you should switch to injection molding earlier than you might expect. This is particularly true because the lead time for injection molding with Fictiv, using steel tooling is only two weeks. Two weeks is much faster than the average time it takes to design and manufacture steel tooling, which for other manufacturers can take months. When injection molded parts are as accessible as these, it’s a no-brainer to start injection molding sooner rather than later.
Wondering how Fictiv can help you in your product development process? Our rapid design validation steel tooling can make your injection molded parts, with no minimum quantity, in just two weeks. You can learn more about our injection molding capabilities on our website, then create an account, upload your model, and unlock your innovation!


