The next piece of Under Armour’s fitness-in-a-box solution is a heart rate monitor! If you missed the first teardown of the Under Armour Scale, check it out here.

I had seen the promotional videos, featuring chiseled athletes breathing heavily through explosive exercises, wearing the strap above a cut abdominal core—heroically glistening Adonises and Aphrodites, cranking out rep after rep.
Well, since none of the above characteristics really apply to me, let’s just go ahead and tear down this heart rate monitor (and tear down the fantasy with it)!

First up: Open up the housing. The outer enclosure halves are held together by six cantilever snaps, so I slipped a blade between the two housing halves to try to pry the device open. It was very tightly locked, so when my herculean efforts were to no avail, I passed it off to Sylvia, who swiftly opened it for me with ease (I swear I must have loosened it or something!).

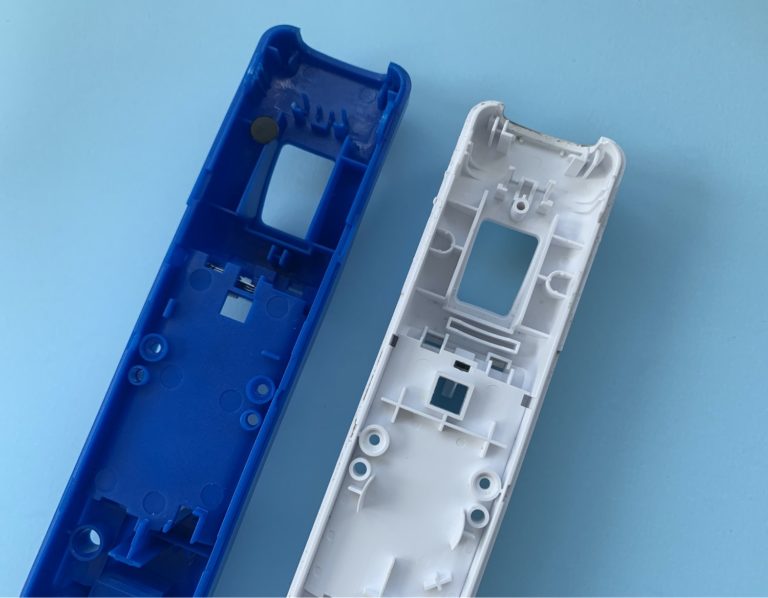
The mechanical components are mostly injection molded plastics, on which we can see ejector pin marks. The white translucent plastic piece is the light diffuser; it’s secured to the housing by heat staking.
You’ll see that the light diffuser is mostly symmetrical, except for an extra pin hole on one side of the part. This is a locating pin for the light diffuser and forces it to be installed in only one orientation—a very well thought out DFA consideration.

The top half of the enclosure has a window in the shape of the Under Armour logo, and when the device is on, a blue light glows through. The window looks like it’s insert molded with the top enclosure piece.

Switching to the bottom portion of the device, we see metal studs molded into the plastic. These were insert molded—the bottom enclosure was formed with the pins fixtured inside the mold. These metal studs snap into to the chest strap. They provide mechanical fastening and are the electrical connection points that transmit signals from the chest strap electrodes to the device.
There are sheet-metal springs surface-mount soldered to the back of the circuit board that hold the battery and connect its terminals to provide power to the PCBA. These springs were stamped and formed to shape.

On to the electronics! On the topside of the PCBA, we see many integrated circuit components, including a microprocessor and bluetooth module. The square component in the center of the circuit board is an LED, and the faint square wave at 12 o’clock of the PCBA is the on-board antenna.

We also found two elastomer o-rings in the assembly—these prevent sweat from entering the enclosure during intense workouts.
We only found four screws in the device. Two of the screws (the gold-toned ones) actually provide the electrical connection between the exposed metal studs and the PCBA. The regular steel screws just provide mechanical fastening.

And that’s the Under Armour heart rate monitor! Due to the simplicity of its assembly, I was able to put it back together quite easily, which must mean it’s time to resume my fitness training. And by “resume,” I mean time to start!