One of the coolest things about Fictiv’s San Francisco HQ office is that it’s dog-friendly! Our furry friends can work alongside us everyday, getting their daily dose of head scratches and belly rubs, and we get a daily dose of adorableness. For National Dog Day, we thought it would be fitting to test out and tear down one of the more widely-known dog monitoring products, the Furbo Dog Camera!
Here are the features of interest we’re drilling into for this teardown:
1. Sensor Assembly
2. Treat Catapult Assembly
3. Manufacturing Complexity
Sensor Assembly

We counted five PCBs: one for the camera/mic assembly, two to control the motor, one for the LED, and one with the micro-USB port.

There was a copper EMI shield wrapped around the sub-assembly, even mounted along the interior of the encasing. This can help improve network connectivity by filtering out exterior interference.

A die cast aluminum block was mounted just behind the camera PCB to help dissipate heat from the board. It’s odd that they opted for such a heavy, clunky option, rather than just using copper heat sink. One possible reason may have been because cnc machining aluminum is typically less expensive and easier to source for die casting.

The main electronic components (camera, mic, lens, etc.) looked simply sourced and inexpensive. Considering the crackly sound coming through the speaker, it’s likely they could have invested in a higher-quality option.
Treat Catapult Assembly

In order to actually throw a treat, there were a number of moving components. These pieces were triggered in a specific order, so the parts could make that a possibility.

All of the steps were connected by several gears and two spring loaded components, all of which were driven by one simple motor.

All the components were made out of common thermoplastics: POM and likely PC/ABS. PC/ABS is an impact-resistant material, which makes sense for something that’s constantly being yanked by springs.

The assembly didn’t always work reliably, and the overall catapult system had a very vertical design. The treats would sometimes get stuck in the cavity, so all you’d hear would be the clicker sound, or it would spew out three treats at once.
Manufacturing Complexity

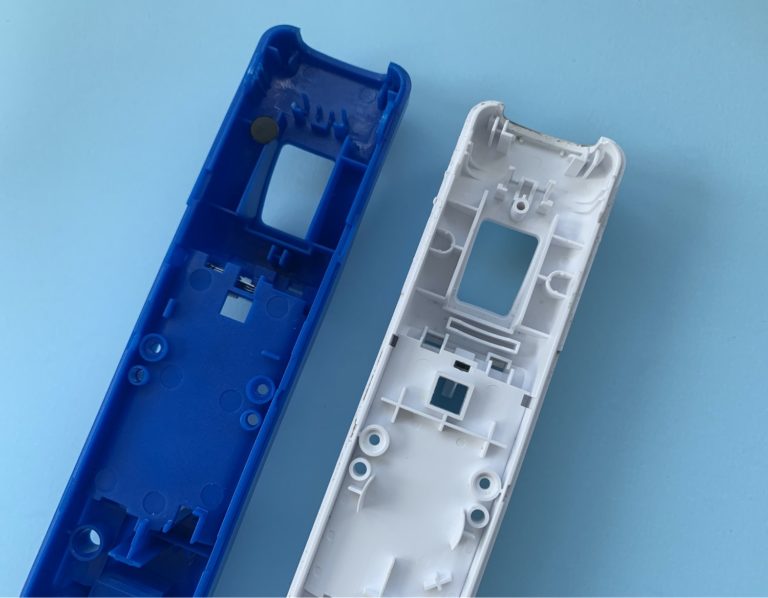
All the plastic components appear to be injection molded, even the gears for launching the treats.

The outer enclosures had ribs that were very tall. It was impressive that the plastic filled all the ribs and did not cause sink marks on the cosmetic surfaces.

The IM parts were designed for high volume production, with ejector pins stamping the tool cavity numbers for traceability when evaluating yield for quality control.

Using a battery as a power source instead of the current cord design could help prevent the possibility of dogs yanking on the power cable to try to get more treats. There was some space inside that they could have played around with more to accomplish this.
Main Takeaways
The primary focus on the Furbo team seems to have been on the industrial design and not on functionality. Although it had a sleek look on the outside, the form factor placed constraints on the type of catapult sub-assembly the team had to use. As a result, the reliability was affected, due to the jamming issues with the treats.
A unit price of $200 seems pretty high compared to other products on the market. Those other options had the same capabilities and included a better user experience on the mobile apps.
Want more teardowns? Check out our Anki Vector Robot and Electric Shaver teardowns. To get the next one in your inbox, be sure to subscribe below!