Time to read: 8 min
When you hear precision CNC machining, what comes to mind? Isn’t all CNC machining “precision?” In a sense, yes. CNC machining allows you quickly manufacture precise parts in large volumes. However, it goes much further than that. In this article, we’ll discuss:
- What is precision CNC machining?
- How do you verify that your parts are precise?
- How can you achieve more precise parts in your own CNC machining processes?
- What to look for when searching for precision contract manufacturing services.
So What Does Precision Really Mean?
Precision and accuracy are often confused and used interchangeably. Both of these are indeed related to quality, but they each have their own distinct meaning.

Accuracy means how close to the targeted values something is; for example, how close the measurement is to the dimension.
Precision is the ability to replicate consistent attributes across a large number of produced units (for example hitting the same dimension when machining 200 parts).
The graphic above is a good representation of the difference between accuracy and precision. If you are shooting darts at a dartboard, you may be able to hit the same area on the target, but it may not be in the center. This would be precise, but not accurate. This is an important point because it is also possible in machining to make many parts the same, but not within your target tolerances! It is necessary to check for both accuracy and precision.
Precision machining is applicable to the machining of a large number of produced units. You can have one accurate part, but you must have many parts to measure and compare in order to call them precise. If someone asks for a single part to be created using precision CNC machining, this is counterintuitive since “precision” in machining would involve multiple parts.
Now let’s talk about precision as it relates specifically to CNC machining. If you order some precision CNC machined components, what should you expect? Suppliers and machine shops should have processes in place to inspect your parts and make sure they meet certain quality standards. They will measure and compare a representative sample of the parts they produce to ensure they complete these quality checks. The next section will go into more detail about some of these quality processes.
How Do You Know If Your Process and Parts Are Precise?
Measurement systems! Your measurement system is an integral part of, well, measuring and determining the quality and precision of your parts. When you want to improve a process, it’s important to be able to identify and measure any issues. This helps determine where the issue or error is coming from and how you can optimize it.
Measurement System
The first step is to make sure your measurement system is good enough. Is it measuring your parts accurately over and over again? (Accuracy and precision!) One way to check this is to use gauge parts and calibration to ensure that your measurement system is performing well. Gauge parts are parts that are machined extremely accurately to a known value. You can measure gauge blocks or pins, for instance, then compare the value you get from your measurement system to the known measurement of that part. Gauge blocks can help with the calibration of your measurement system as well — and that calibration should be done regularly.
Some common processes used in development to find measurement errors are Gauge Repeatability and Reproducibility (GR&R) and Measurement System Analysis (MSA). These are important to follow as they will help you collect good data that can be used to identify the error in your measurement system or parts.
Measurement System Analysis
A Measurement System Analysis is a statistical method to determine the amount of variation that exists within your measurement process. Is your measurement system consistent and reliable? Are the people taking the measurements doing so consistently? Are your parts being made with minimal variation?
These are a few sources of error that can lead to larger variations in measurement: processes, personnel, equipment, and environment. If you identify that one is causing a significantly larger proportion of the variation, you can address that issue and know that you’re getting good measurements. You want measurements to be repeatable, reproducible, stable, and not include bias. An MSA helps to ensure that your measurements are on the right track.
Gauge Repeatability and Reproducibility
Gauge Repeatability and Reproducibility is a commonly used type of MSA. Repeatability refers to the ability of the operator to get the same measurement over and over again on the same part. A reproducible measurement is one that can be consistently and accurately measured by multiple people. By identifying the variation within one person’s measurements and from person to person, you can identify the actual part-to-part variation.
To conduct a GR&R, the traditional rule of thumb is to utilize 10 parts and 3 people to measure the parts, utilizing a single tool or gauge. Each person will measure each part two times. With the resulting data, there are numerous analyses you can do to evaluate your measurement system. You can calculate the components of variation as mentioned earlier: repeatability, reproducibility, operator variation, and part-to-part variation. You can look at an Xbar or R chart, which are graphical representations of variation by the operator. In short, there are many ways to look at the data and figure out whether your measurements are precise.
Identifying these different sources of variation is critical to increasing the precision of your contract CNC machining process and parts. If you find that most of the error is coming from a lack of reproducibility, for example, you can focus on training operators rather than wasting time and money trying to improve your measurement system.
How Can You Improve the Precision of Your CNC Machining Process?
If we continue thinking about our hypothetical MSA, there is also the chance that your measurement system isn’t the problem. Maybe you’re actually getting great measurements, but your parts are not as precise as you need them to be. There are many ways to improve precision across your CNC machined parts.
A good first step is to think about your design from a Design for Manufacturability (DFM) perspective. A lot of DFM principles will also contribute to the precision of your parts. The five design parameters to pay attention to are geometry, material, tolerance, part size, and look/feel (check out our DFM for CNC Machining Masterclass for more on this). The effort drivers for these parameters are also tied to precision – the more effort required to machine these parts, the more effort it takes to machine them with precision.
A particularly important design parameter that impacts precision is tolerance. Precision machining process design is all about consistently staying within your tolerance limits, especially when your parts require tight tolerance or tight fit tolerance.
For instance, the stiffness of the entire system is a key driver of machining for tight tolerance, and therefore precision. There is a line of compliance between the workpiece, workholding method, the tool, and the machine itself. Precision machining is only accomplished if you have precision machinery and precise tools and precise holding mechanisms. If there are any reductions in stiffness along this path, it can lead to deflection and chatter, which in turn cause dimensional inaccuracies. To increase the precision of your CNC machining process, make sure your system (workpiece, workholding, tool, and machine) is all as rigid as possible.
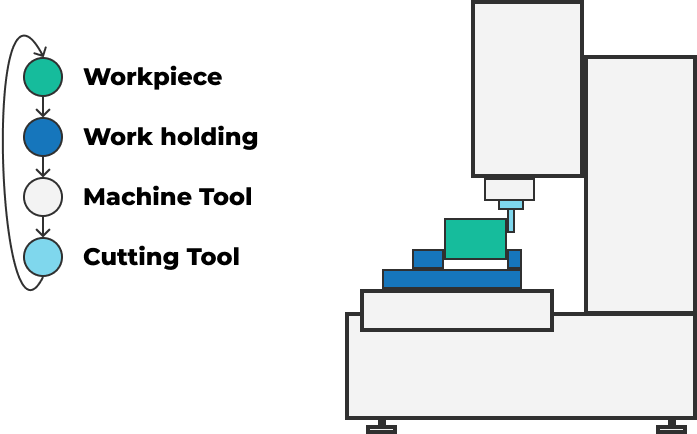
This brings us to workholding, another important piece of the precision puzzle. Again, when we talk about precision, we focus on part-to-part variation. How are you making sure that every part is placed in the exact position as the part before so that the CNC program will create the same part? Your fixturing method is critical; it must constrain each part stiffly and in exactly the same position. One concept you can incorporate into your fixturing method is kinematic coupling.
Kinematic coupling allows you to constrain all six degrees of freedom of a part, without overconstraining it. This comes from the idea of exact constraint design, which says that the number of points of constraint should match the number of degrees of freedom you want to constrain.
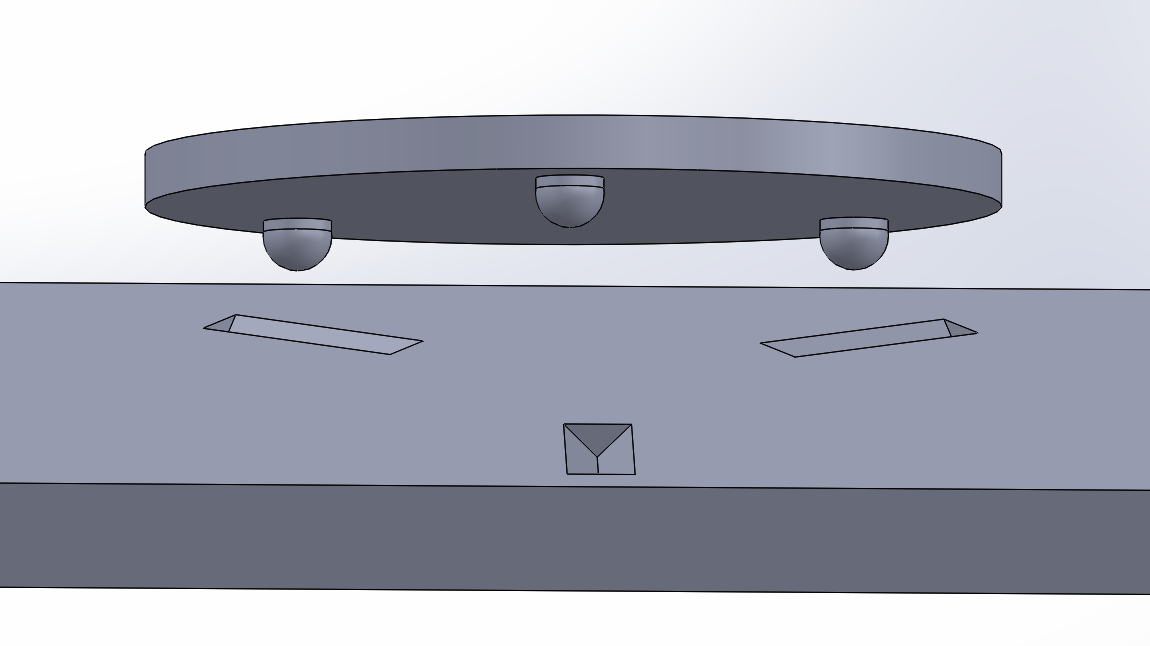
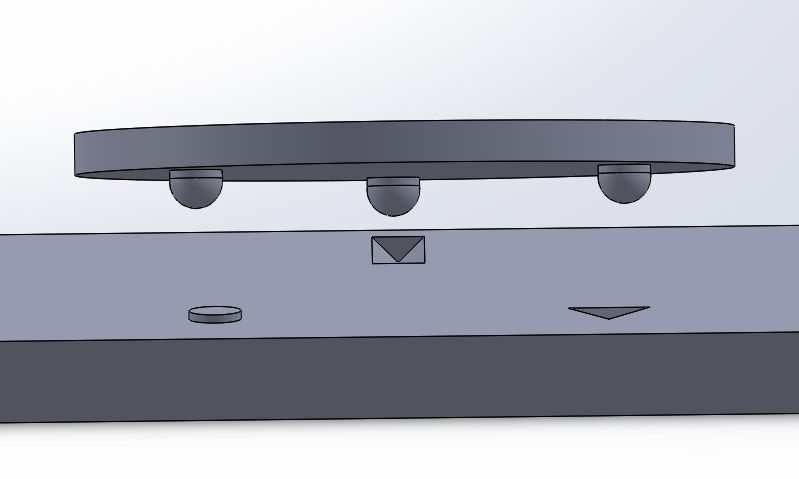
There are two types of kinematic coupling: Maxwell coupling and Kelvin coupling. A Maxwell coupling system has two parts: one with three v-shaped grooves on one part, all oriented towards the center, and one with three curved surfaces that mate with the grooves. On the other hand, a Kelvin coupling system consists of one part with one concave tetrahedron, one v-shaped groove, one flat plate, and a mating part with three spherical surfaces. This is an important concept in precision engineering and could greatly improve the CNC machining of your parts.
Why is Precision Important?
So far, we’ve talked a lot about precision: what it is, how you analyze your parts and process, and how to improve the precision of your CNC machined parts. Finally, I want to touch on why it’s so important to spend valuable time and money on these steps.
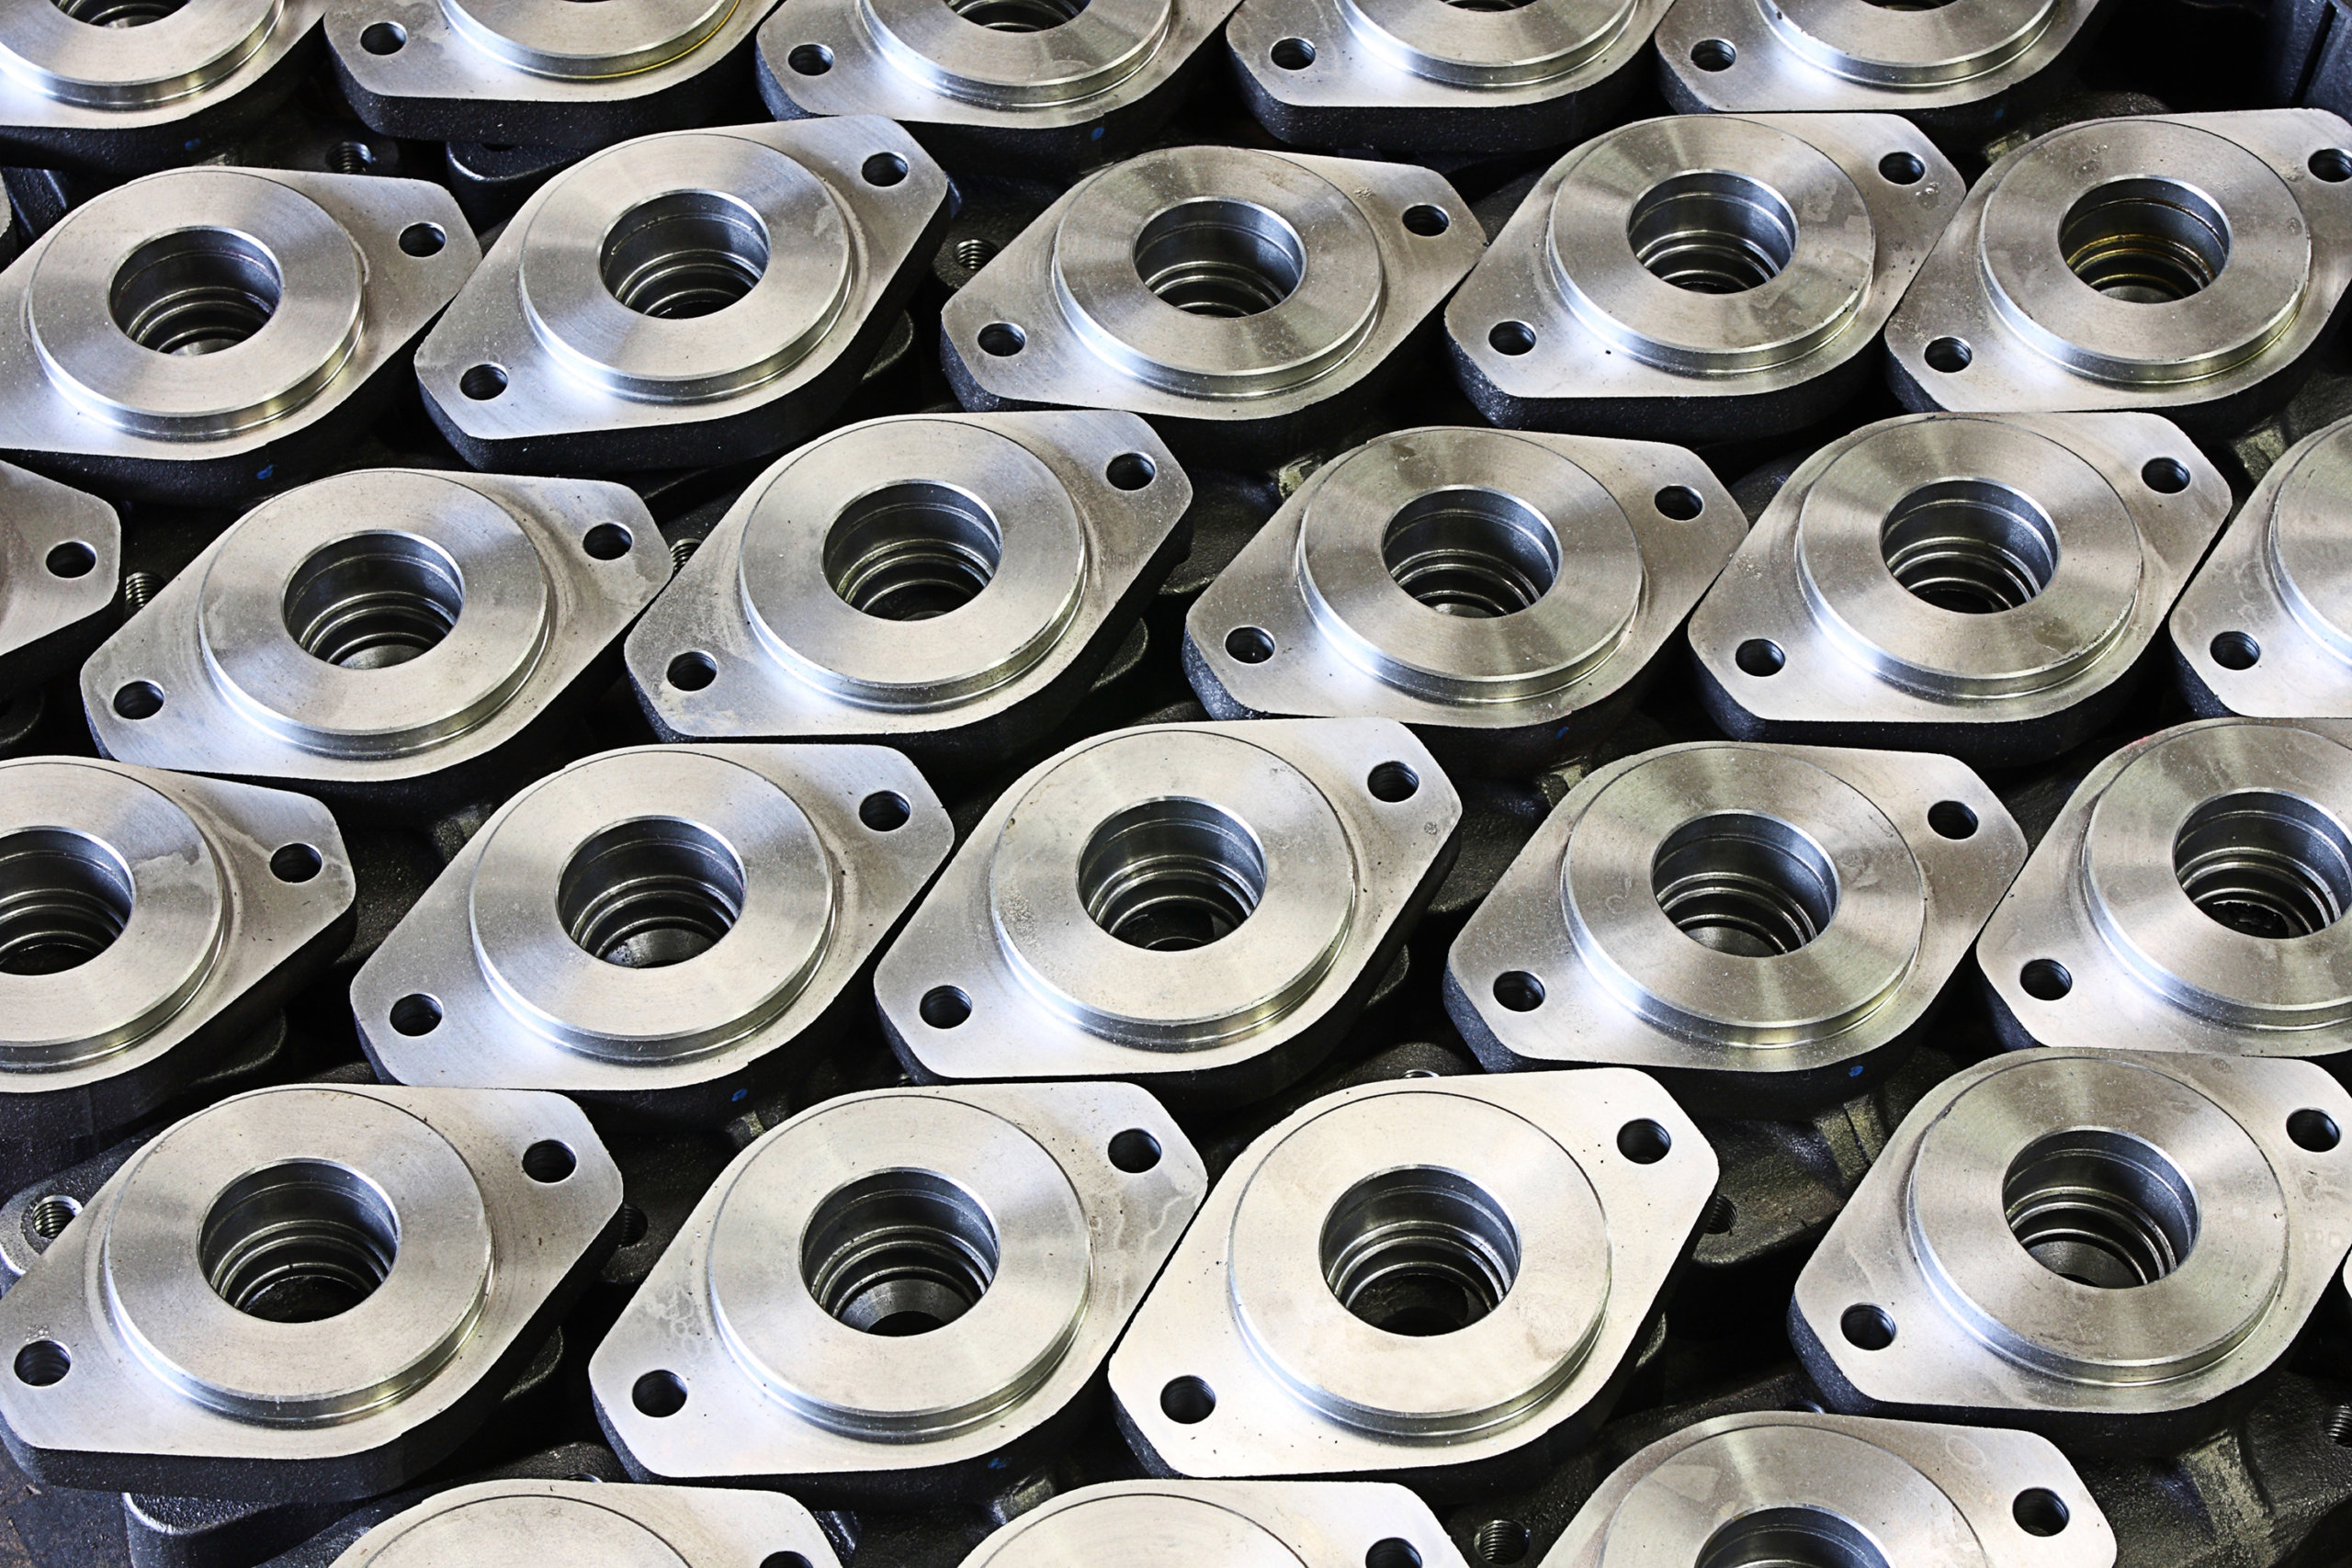
Precision machining is more important in some industries than others. Some parts or products need to be extremely reliable and work every single time. Take medical devices, for example. That surgical robot that the doctor is driving needs to do exactly what it’s told to do, with no lag, slip, or unexpected movements. Even a “simple,” everyday blood pressure reading is very important for the right diagnosis and needs to be correct every time. There’s not much room for error when it comes to people’s health.
The automotive industry is another one that needs precision parts. You want your car to drive reliably every day, right? And consumer electronics: you want your phone to be able to turn on and make a call when you need it to. Each of these products comes down to the interaction of many parts that fit and work together — they all require precision machined parts that are made the same way, every time.
And CNC machining manufacturers care about precision too. An imprecise process is costly; it results in more scrap parts that don’t work, more rework cycles, more time, and overall costs more money! However, it’s also important to realize when precision isn’t important. Fancy new measurement systems are expensive, require time and attention to set up and characterize, and you may needlessly add cost to your price by focusing too much on precision.
Again, CNC machining is an amazingly capable process that can instantly elevate the quality and efficiency of your parts and process. For some parts, it’s important to pay extra attention to the precision component: are your parts consistently within the tolerance and quality that you need? Think about parts that you are currently working on. How important is precision in your specific application? How can you improve your design, machining, and measurement processes to improve the precision of your CNC machined parts?
The optimal method is to look into outsourced machining for precision CNC parts. Fictiv is the ultimate partner for high precision machining and tight tolerance machining, so check out our precision CNC machining services to learn more about how we can help!
Sourcing Simplified
If you’re tasked with sourcing and supplying mechanical parts, Fictiv is your operating system for custom manufacturing that makes it faster, easier, and more efficient. In other words, Fictiv lets engineers like you, engineer. We offer a range of manufacturing capabilities to produce both simple and incredibly complex geometries — create a free account and upload your designs today!
