Time to read: 5 min
At this phase in the FictivMade multi-tool phone stand project, I’ve refined my product for production using insights gained from multiple prototype iterations of the original design. Now it’s time to get it quoted for manufacturing.
In my experience, it can be helpful to get quotes earlier in a project to provide an initial sense of cost, lead time, and manufacturability. However, the further along your product development is, the more accurate those quotes will be.
Starting a Quote for my Phone Stand/Multi-Tool

To start a new quote, I selected injection molding for the manufacturing process and uploaded my CAD files. I had to specify that the metal insert would be CNC machined, although it could be die-cast later at higher volumes. Then I filled out my project requirements, using overseas production at our manufacturing partner in China.
Project Requirements and Part Configuration on the Fictiv Platform
Overview of Inputs for the Quote:
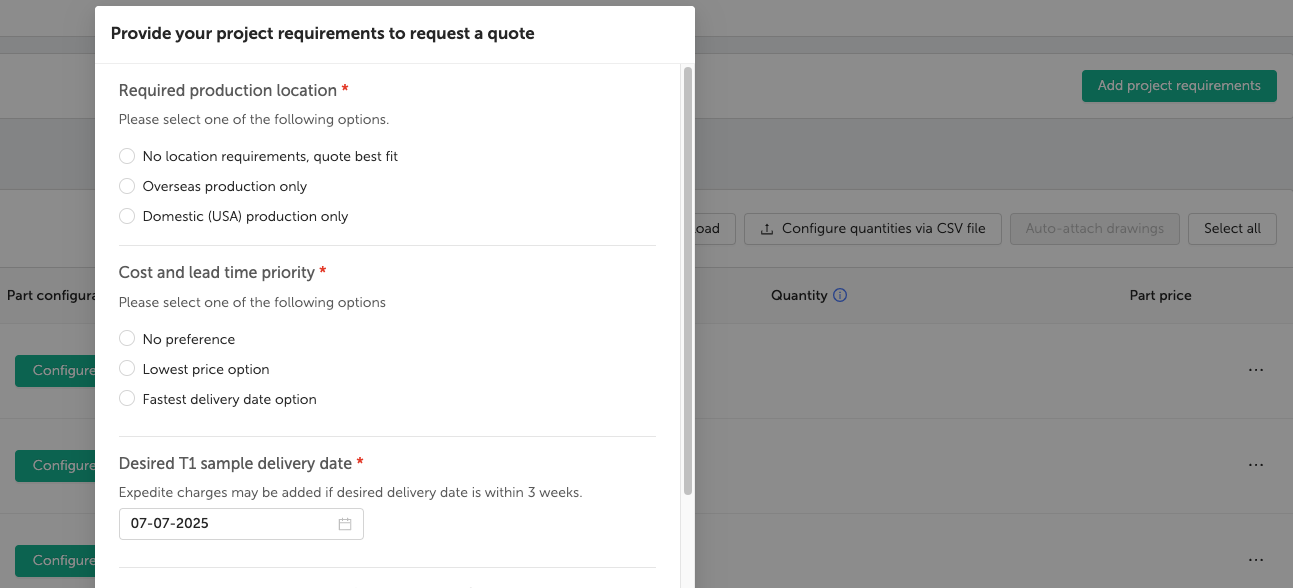
- Request domestic or overseas manufacturing if you have a preference
- Prioritize cost or speed if you have a preference
- Select the desired T1 sample date
- Select NPD (New Product Development) or production
- Select any additional services you may need (may increase pricing):
- Mold flow analysis (preliminary or advanced)
- PPAP
- APQP
- Select tool life (# of shots) and/or configuration (# of cavities) if desired
- Add any additional notes about the project if desired.
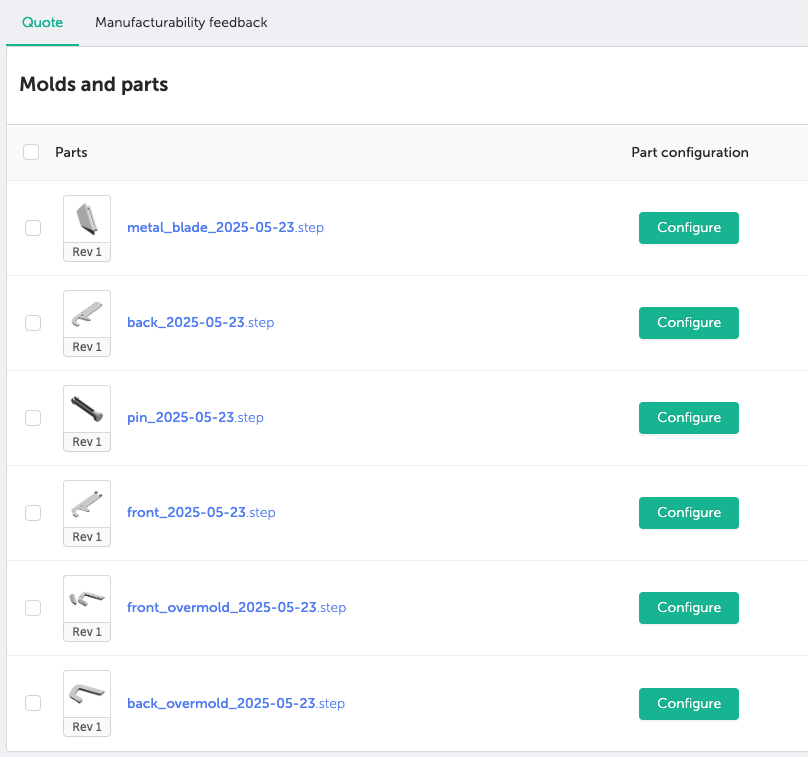
After adding project requirements, the parts must be configured with each of the following specified:
- Material (if you’re not sure, ask our Materials.AI for suggestions)
- Finish
- Color
- Quantity
Material and Finish Selection
After using Fictiv’s Materials.AI for some advice, I chose PC/ABS due to its moldability, impact resistance, and moderate flexibility. For the overmold grip, I chose a 70A shore TPU for a good mix of rigidity and compression with lower risk of delamination.
I requested a light matte texture (MT11000) with a high-polish finish for the recessed Fictiv logo. I also selected specific Pantone colors—Fictiv Green and Carbon—for the respective parts to ensure accurate color matching.
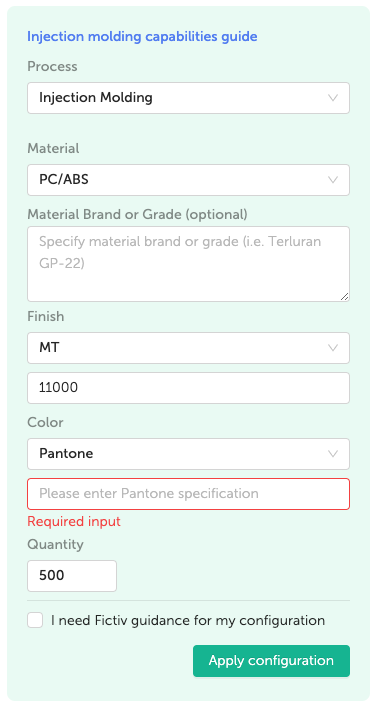
After a save and close, I clicked “View Feedback” to see the automated DFM.
Fictiv’s Automated Design for Manufacturing (DFM) Feedback
Thickness Analysis
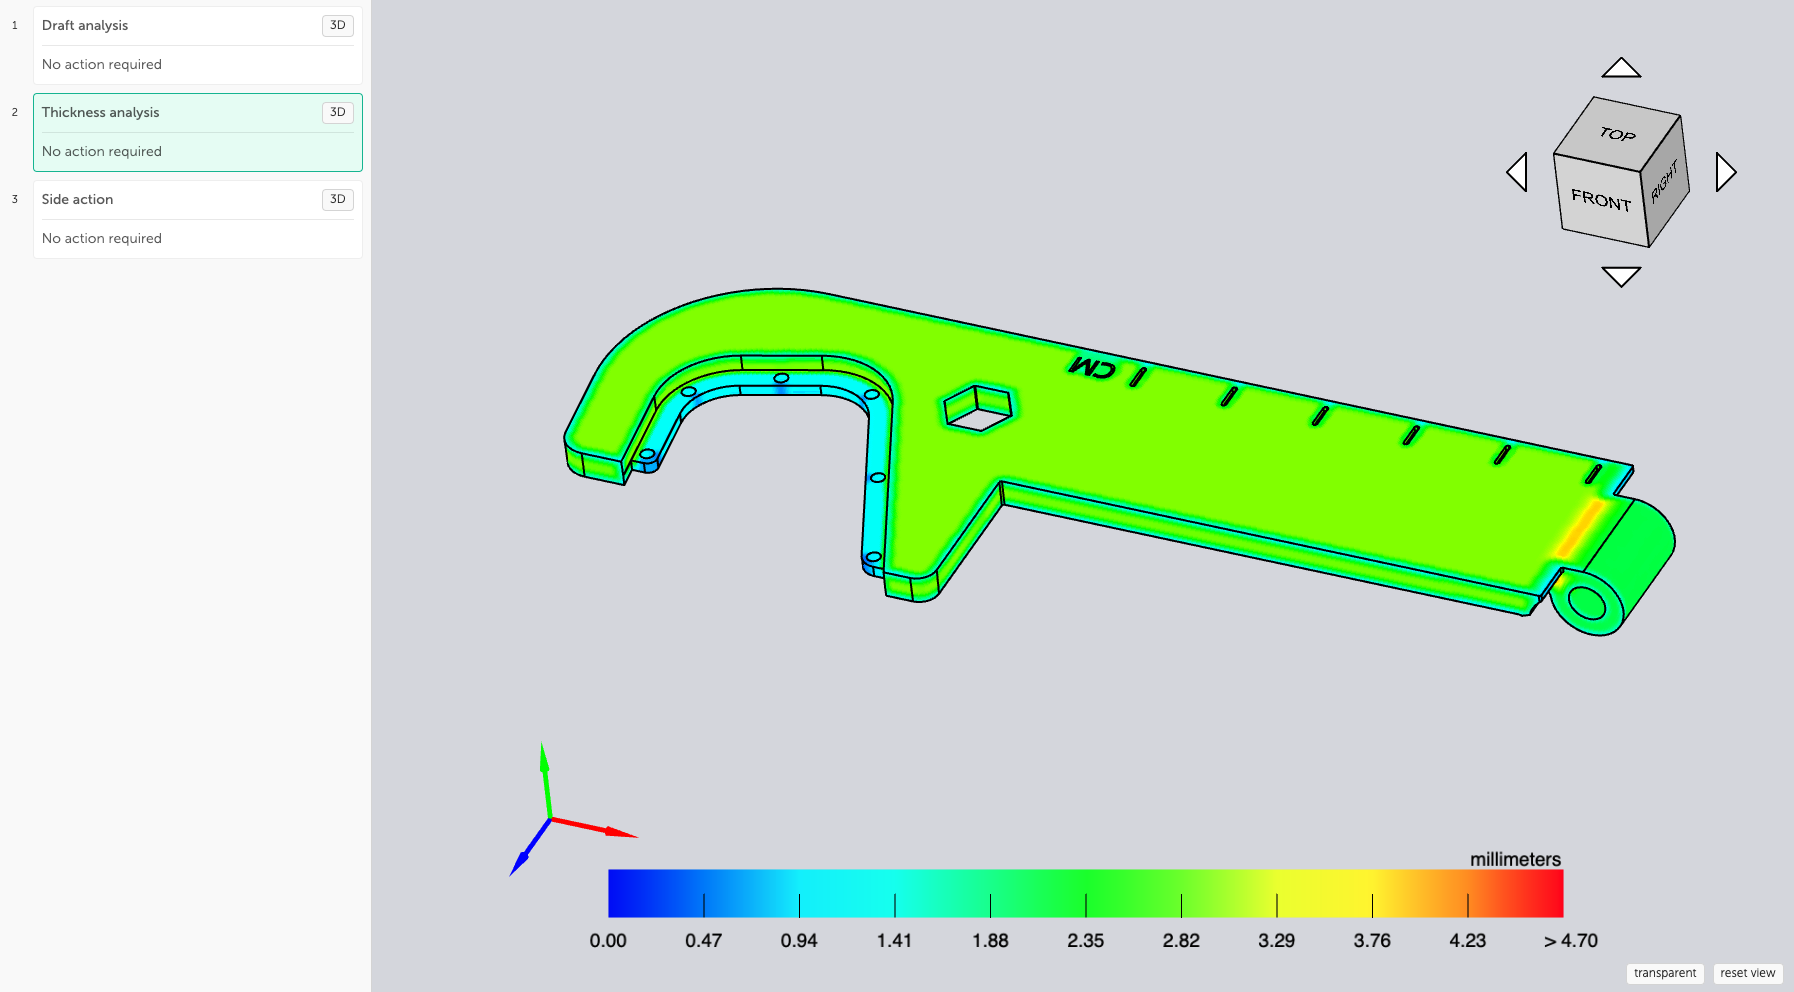
I realized there were some thick and thin areas on the part, but decided to move forward with the slight risk of sink in the thicker area by the hinge, which could likely be processed out by adjusting molding parameters.
Deciding whether or not to core this area out comes with experience and understanding your supplier’s capabilities. If the area is red on the DFM, or you have any doubts, it’s always safer to core out (remove plastic) in thick material sections if allowable.
In the thin areas, such as the ribs for the overmold shown in light blue, I have a steel-safe option to thicken it later, which reduces risk. This means I could remove steel from the tool easily to make the ribs thicker if necessary.
Draft Analysis
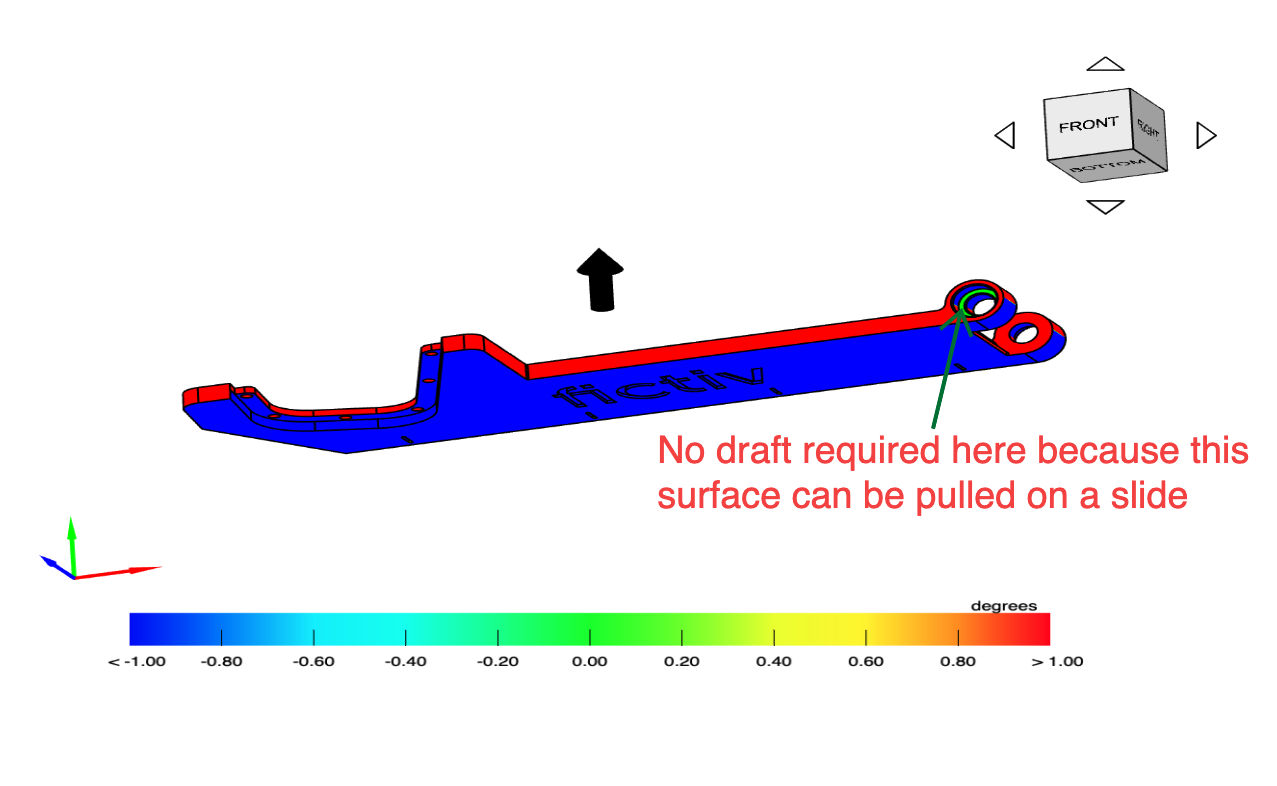
The draft analysis clearly confirms adequate draft angles in the main direction of pull for the mold and the necessity for slides in the hinge area. The coloring allows you to clearly see the parting lines and any sections that may not have enough draft. The front and back parts are relatively thin, so one degree of draft was sufficient in this case.
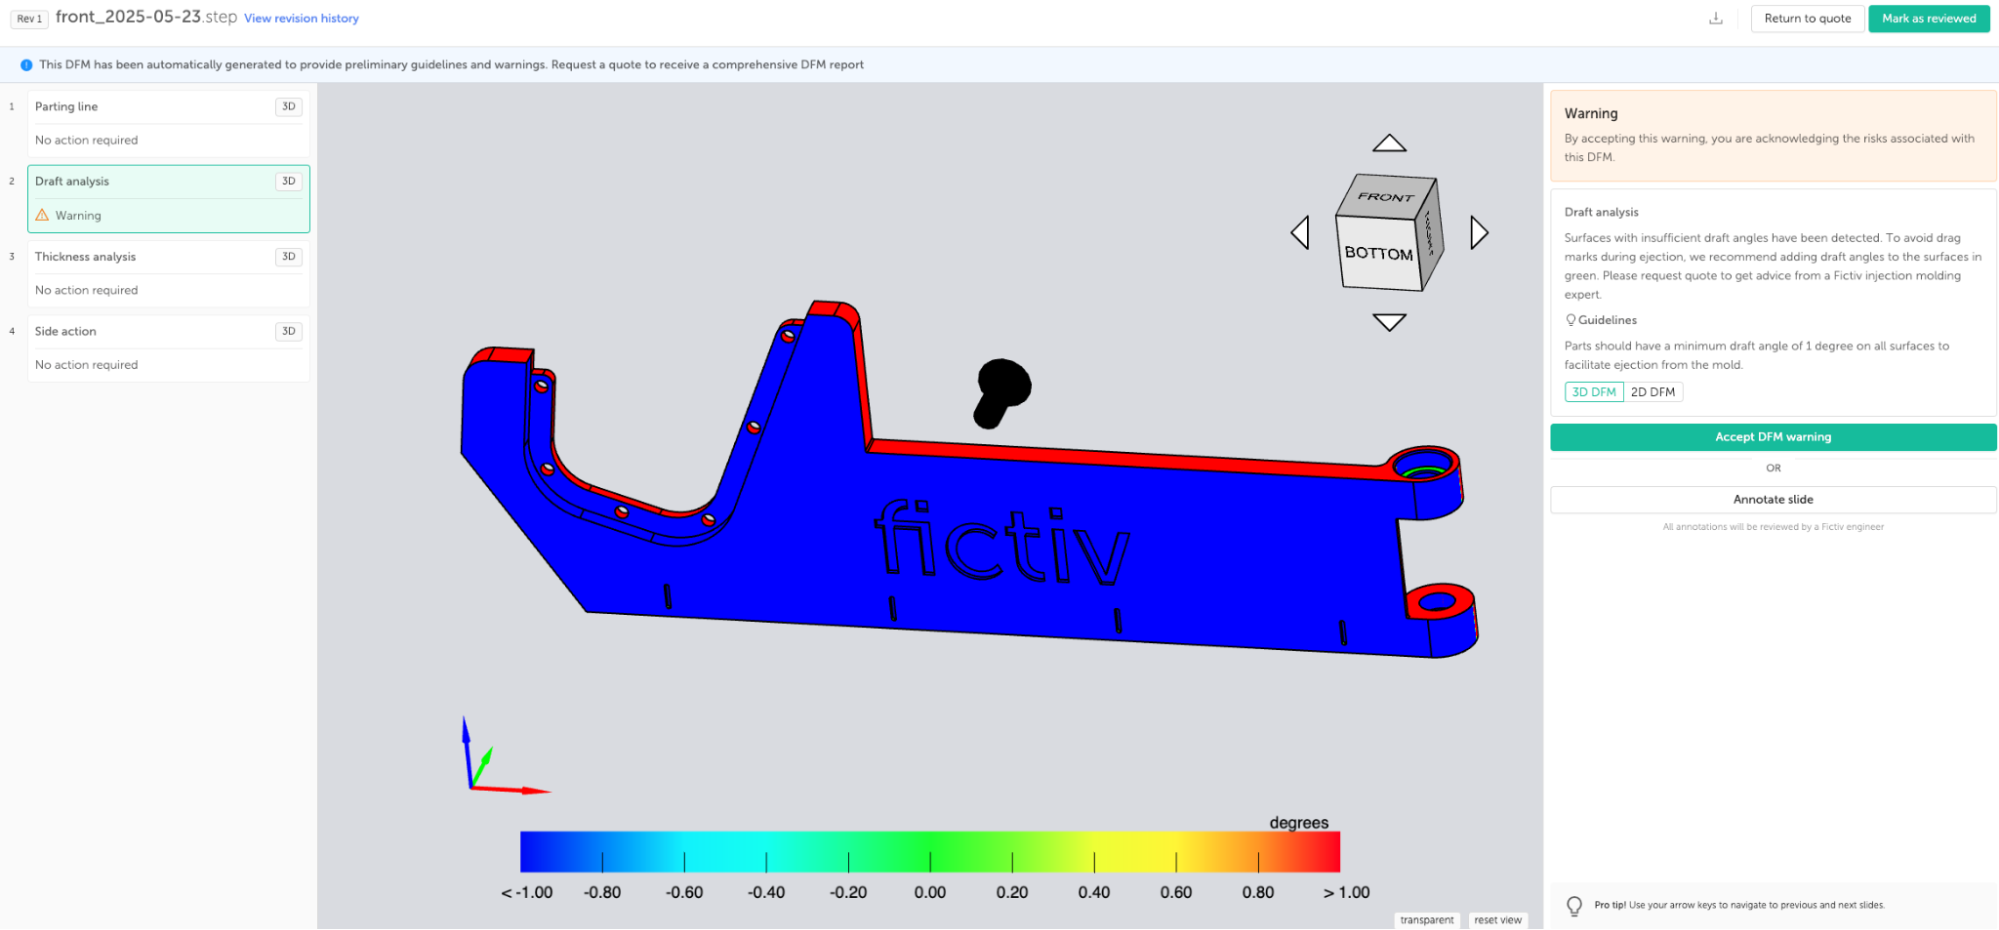
With sliders, there is a separate box in the feedback review. It clearly shows that I need slides for the hinge area as expected. I added one degree of draft to these surfaces, although sometimes you can get away with zero draft and a polished surface if necessary for the design.
DFM Slide Annotation
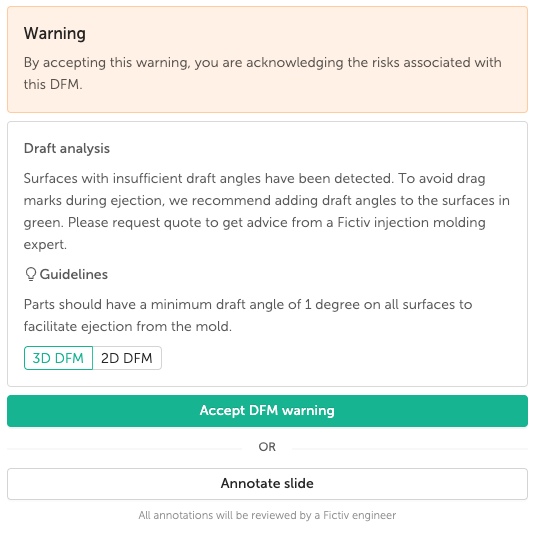
A great feature of the Fictiv platform is the ability to annotate slides to communicate your intentions on the DFM, as shown.
After that, I just needed to make a few more necessary design changes and then upload part revisions in the same quote.
New Injection Molding DFM Features on the Fictiv Platform
The Fictiv platform now features additional DFM capabilities, providing you with even more insight into the tooling design and its impact on the final product.
Ejector Pins
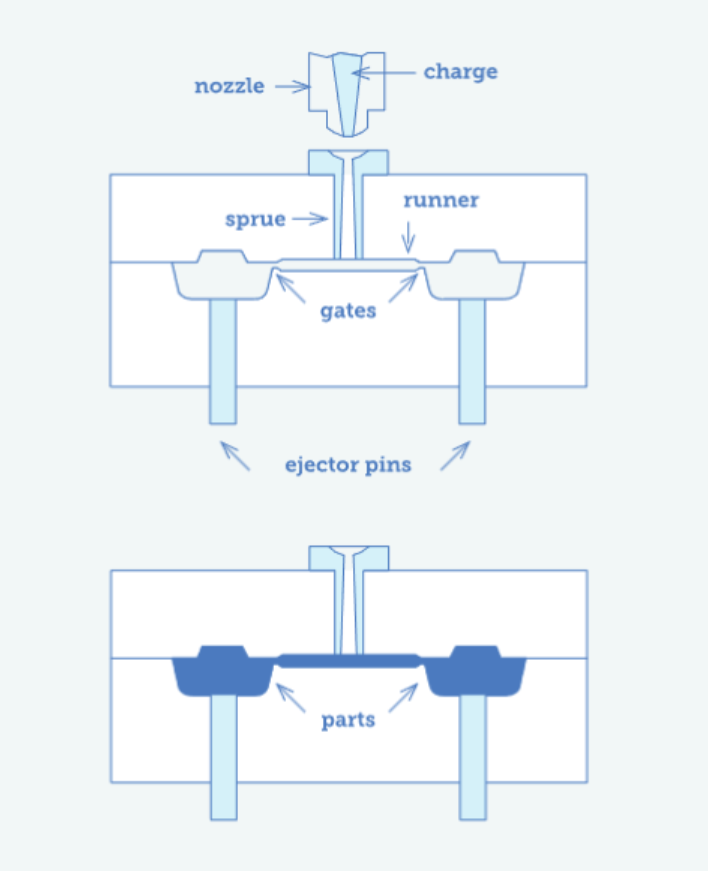
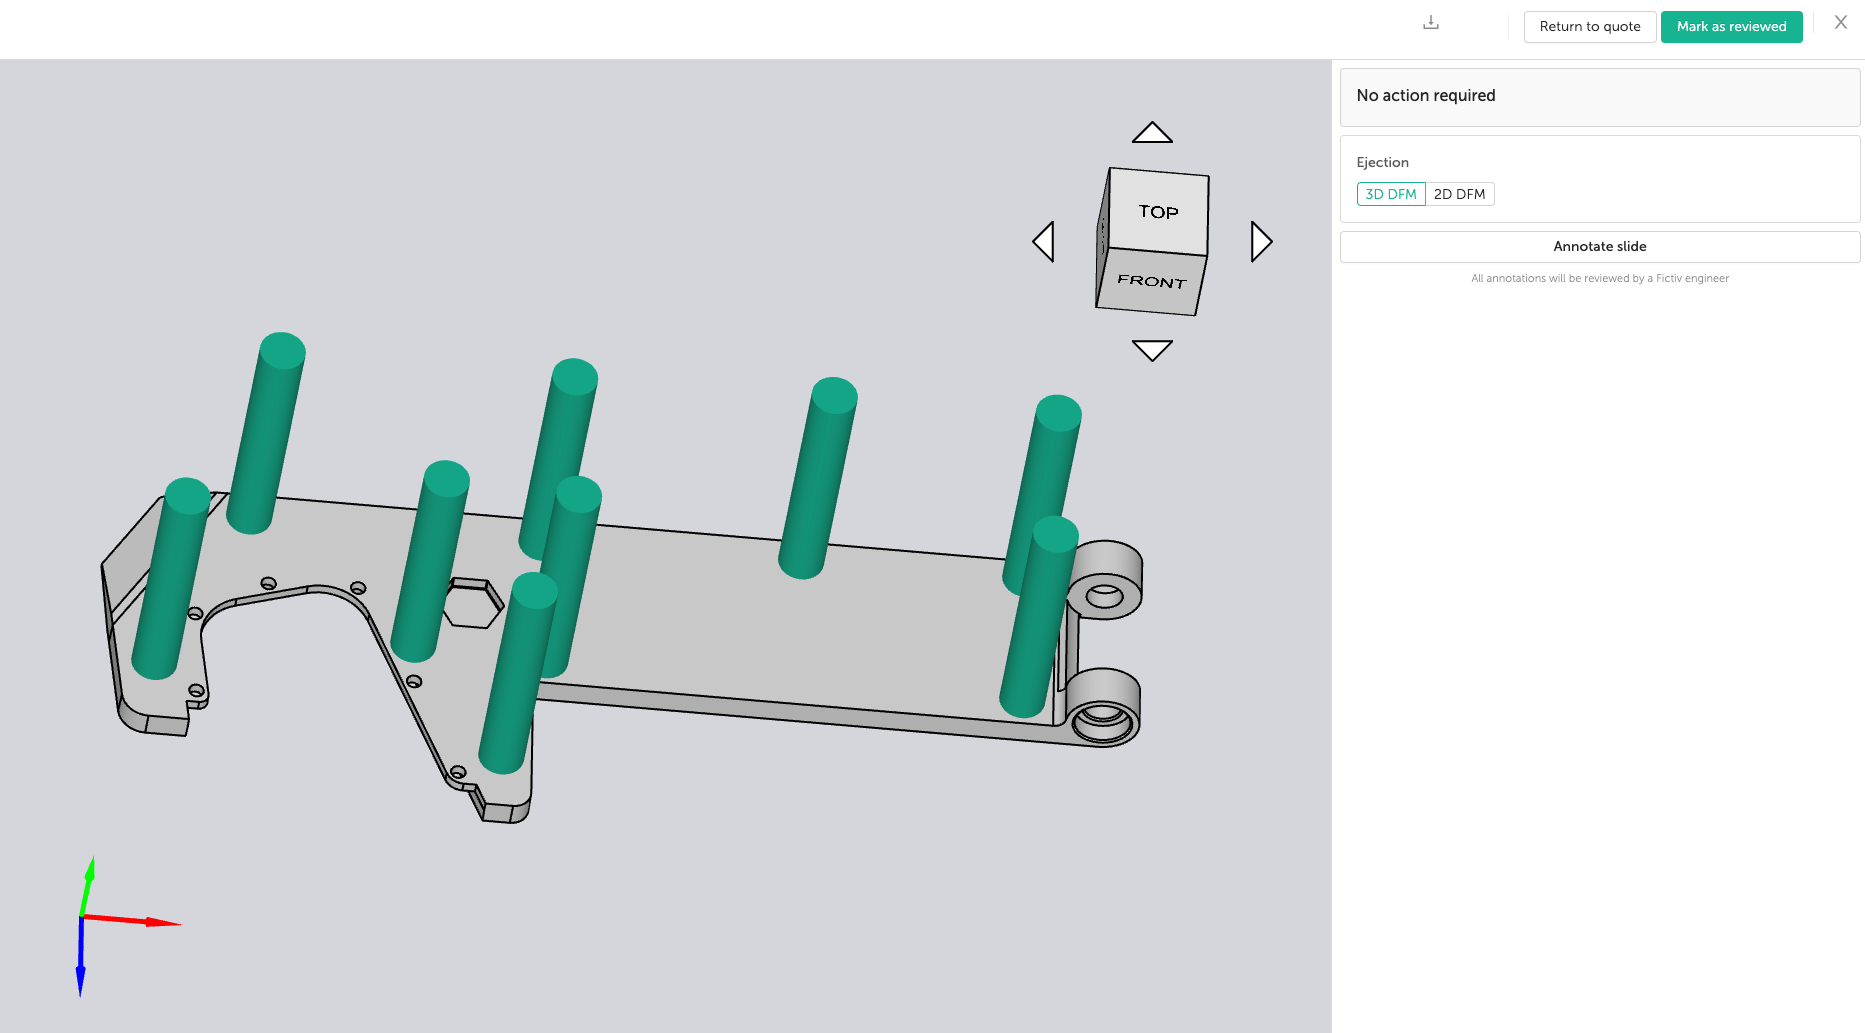
Ejector (EJ) pins are a necessity in most injection molding scenarios in order to push the part out of the cavity of the tool. I was able to clearly see the pin locations necessary for ejection and understand that there will be a slight aesthetic mark in those areas.
The number and size of the pins can potentially be reduced and compensated for with additional draft on the overall part. I considered pushing for fewer pins to improve aesthetics, especially in the overmolding rib section, but I accepted it because the interior surface is less cosmetic (Class B) surface that would be mostly hidden.
Gating
The gate is the injection point where molten plastic flows into the mold to create the part. Most gates typically leave a visible vestige that can be trimmed off as flush as possible after molding. The gate type and location are critical factors to consider when it comes to the part design, material, and finished quality — both aesthetically and functionally.
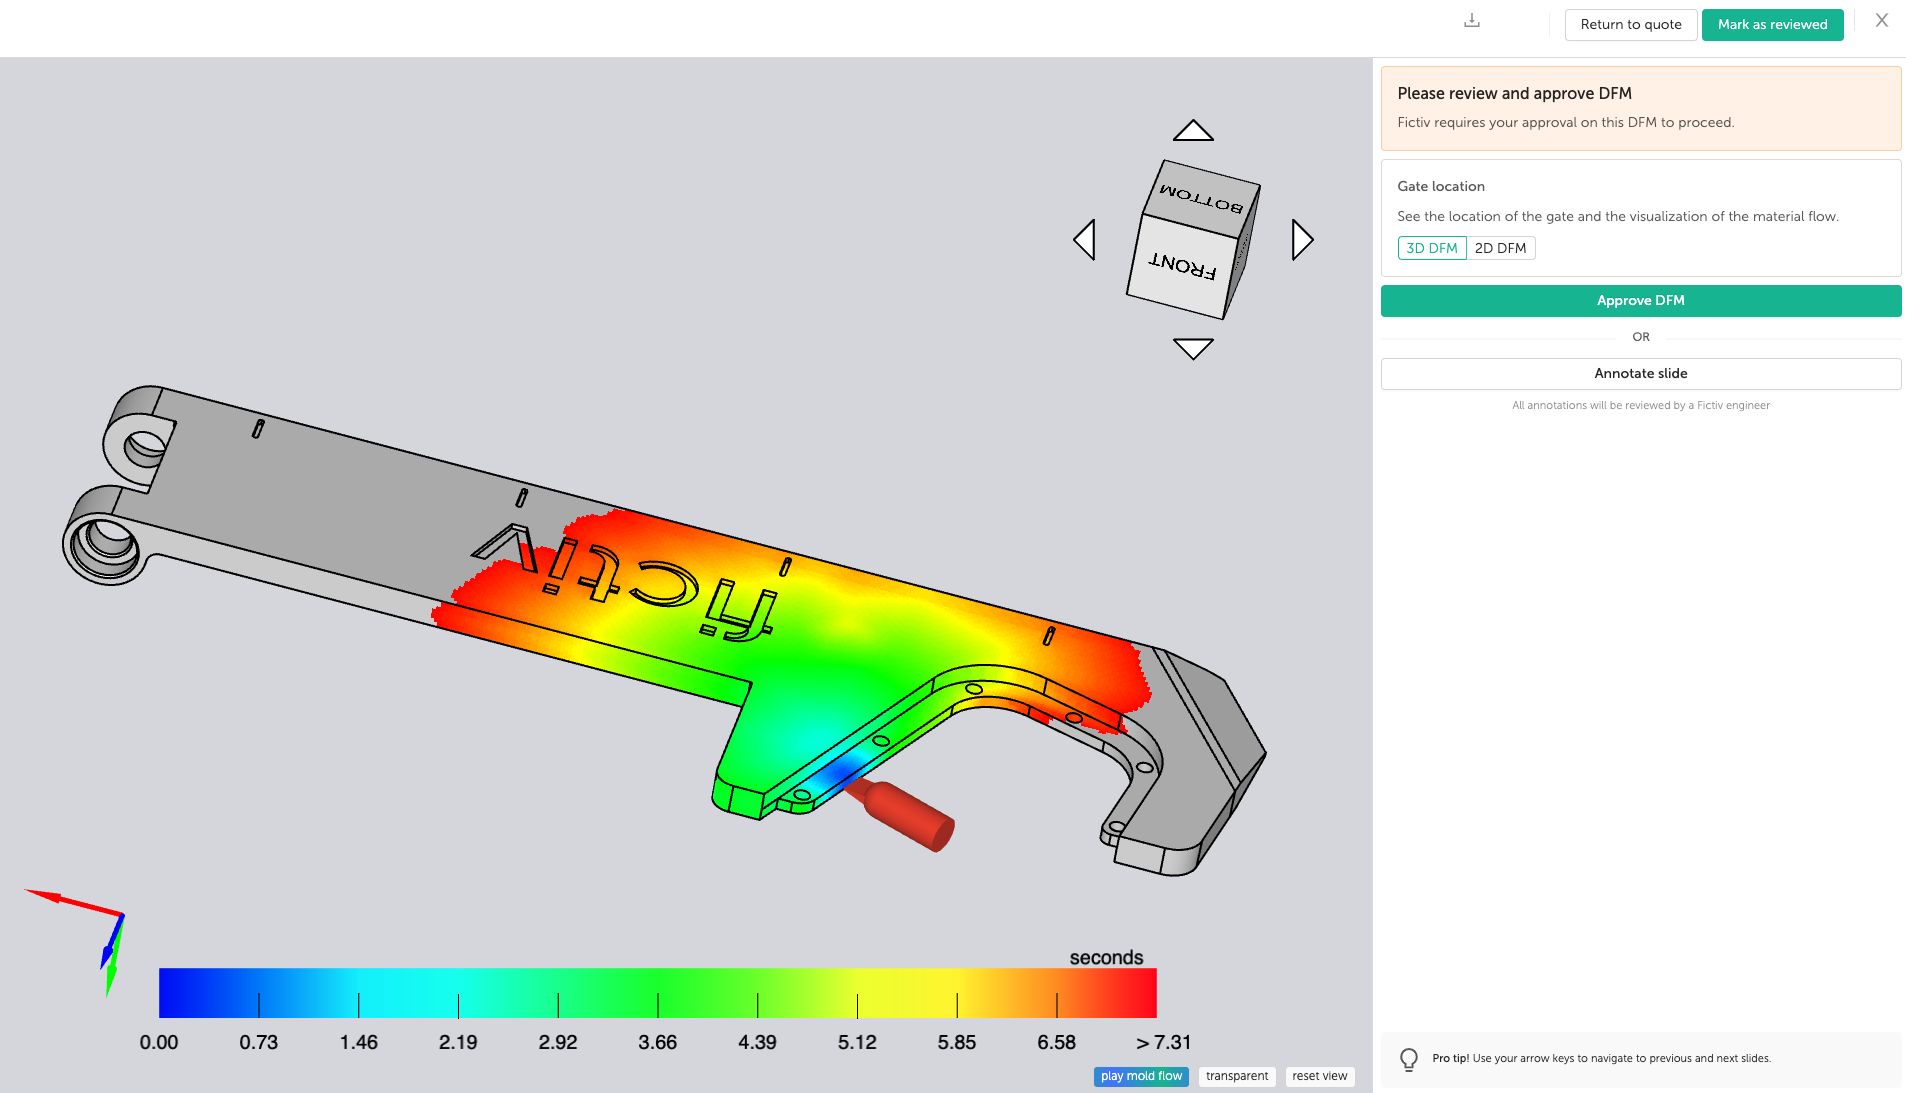
The DFM shows the gate and allows you to provide feedback on whether the location is acceptable. I saw that my gate location on the ribs would be covered by the TPU overmold, so it wouldn’t be a factor cosmetically.

Mold Flow Visualization
A quick look at a mold flow simulation is helpful to understand how the material will flow through the part. This is important to predict knit lines where the flowing material meets, typically on the opposite side of the gate. It will also raise any concerns about mold fill to prevent short shots.
You can also request a more detailed mold flow analysis (at an additional cost) when filling out your project requirements. I had no problem with my mold flow as it was pretty straightforward, but it can be critical with more complex designs.
Thin Mold Steel
Thin steel is important to look out for because long, narrow, or sharp sections of the tool are prone to damage or breaking. This can affect part quality and leave plastic material wherever the steel comes off. Replacing the missing tool steel is a more complicated and expensive fix that requires welding, so make sure to meet the minimum thickness and size requirements for your design features.
I resolved a couple of sharp areas in my design. Most notably, the thin markings for millimeter measurements had to be spaced out and changed to centimeters.
Mold Library
Fictiv’s Mold Library is a great resource that provides full transparency into the molds that you have developed and own. You can easily select a tool and manufacture additional parts with it, without going through the entire quoting and DFM process again. However, your mold will not show up in this section until after you have placed the order.
Time to Send It!
After filling out project requirements and reviewing automated DFM, simply request a quote and you will receive a full DFM report from an expert in as fast as one day! Then you can place the order.
Ready to get your design made? Get started with a quote.


