Time to read: 8 min
Rubber prototyping with elastomeric and polymer products is a tricky task that requires balancing material durometer, tear strength, and production scalability. Unlike rigid plastics, elastomeric polymers introduce unique design for manufacturing (DFM) challenges, including material deformation under stress and mold release constraints.
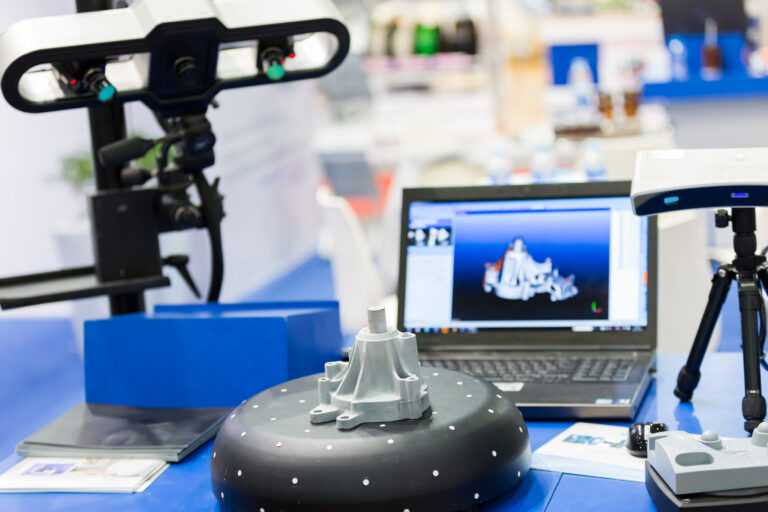
Selecting the best rapid prototyping method for rubber parts depends mostly on whether your design phase requires geometry verification, functional seal testing, or low-volume bridge production.
Overview of Rubber Prototyping Methods
In addition to 3D printing are two common, if old-fashioned, methods to prototype rubber materials: molding and milling. Each process has areas where they shine—and designs where they’re absolutely the wrong choice. We’ll start with the narrowest application: milling elastomers.
(Quick note: Though “rubber” often references naturally-derived elastomers, we’ll use “rubber” and “elastomer” interchangeably.)
Milling Elastomer Prototypes
CNC milling elastomers is limited for one major reason: Cutting something that’s constantly bouncing back is difficult. Milling rubber is only effective when the elastomer is nearly rigid. Anything softer than the hardness of a shopping cart wheel will be pushed around by the cutter, instead of being shaped.
If you absolutely must try milling your rubber prototype, machinists have some tricks. To keep the elastomeric prototype part from squeezing away from the cutter, put a collar just above the blade; the collar can “float” on the rubber part, keeping it from lifting away. Another cool trick is to freeze the elastomeric part in liquid nitrogen, temporarily increasing its hardness.

Keep in mind that even with these tricks, the detail on the rubber prototype parts will be poor, so if you need high-resolution geometry, you’re better off with another option. Which brings us to…
Molding Elastomer Prototypes
For many years, molding was the only option for quality elastomer parts. Times change, but urethane casting still has an important place in today’s prototype manufacturing.

Creating molds was once a two-week process but now can take less than two days. First, a master part must be created, with the exact geometry of the final parts. In the past, the part was CNC milled, but now the master can be either machined or 3D printed depending on tolerance and finish requirements.
Once the master pattern is created with the correct material shrink rate added and finish applied, RTV (room temperature vulcanizing—curing without being heated) silicone is poured around the master part and allowed to harden. Finally, the silicone mold is cut into an A and B side, the master is removed, and voila! A mold ready to replicate the desired final part.
The biggest advantage of this method is that the silicone mold can be reused many times, so urethane casting is used for low-volume production, too. With all the available urethane compounds, you have a virtually unlimited selection of properties, such as durometer and temperature use.

The drawback is that even with a 3D printed master, the process is still long to get even one elastomer prototype. Which is why, for those of us old enough to remember, 3D printing is such a miracle.
RTV Silicone Rubber Prototyping vs. Silicone Compression Molding
For components requiring exceptional thermal stability, chemical resistance, or medical-grade biocompatibility, silicone rubber prototyping is mandatory. While Room Temperature Vulcanization (RTV) silicone molding is ideal for rapid, low-cost polyurethane prototype casting, prototyping with true silicone requires a shift in methodology. True silicone prototyping relies on rapid prototype compression molding or liquid silicone rubber injection molding to properly manage the heat and pressure required for the material’s cross-linking cure cycle.
3D Printing Elastomer Prototypes
Finally, 3D printing elastomer prototypes—what you’ve all been waiting for—or rather, what we’ve all been waiting for. Elastomeric materials are newer developments for 3D printing and therefore not perfect, but still pretty amazing. It isn’t the best option for all applications, though, so let me guide you through your decision for your design.
One of the first 3D printing methods of simulating rubber used selective laser sintering (SLS) with a flexible base, which resulted in an elastic part. However, the parts are still quite stiff, have low stretch, break after repeated flexure, and have a low-resolution finish—not ideal for many prototypes. Originally, this was the best that could be hoped for, but since then newer materials have made their way into the market.

An incredible advance in printing came with PolyJet technology. With multiple materials coming from the same head, in countless combinations, PolyJet not only can accurately simulate rubber properties, but it can also simulate over-molding—where a rigid part is partially or fully covered in a rubber-like material—which used to be particularly difficult to prototype.
Add the fact that PolyJet materials can simulate elastomer prototypes ranging from 27-95 shore A, and it seems like a nearly perfect material. Unfortunately, before you decide to go with this option, you do have to look at material property requirements: Some of these rubber-like materials (like Tango) lack the strength of true rubber parts, so use some caution.

An even newer printing technology for elastomer parts was introduced with the advent of CLIP (Continuous Liquid Interface Production) printing, which allows for more consistent isotropic properties in 3D printed parts. Using real polyurethane, the Carbon printers yield production-quality rubber parts using digital light synthesis (DLS). Since its introduction, many elastomeric materials have been developed and are now available in durometers from 35A to 88A.
How to Simulate Production Rubber in the Prototype Phase
When prototyping, you must distinguish between testing a part’s geometry and testing its chemical or mechanical endurance. Additive and cast prototype materials only simulate the properties of true production thermoset rubbers:
- To Simulate EPDM: If your end-use part requires EPDM for weather or ozone resistance, use a 60A to 70A polyurethane cast resin for environmental testing, or Carbon DLS SIL 30 for flexible outdoor exposure testing.
- To Simulate Nitrile/Buna-N: Standard 3D-printed flexible materials will degrade rapidly for oil resistance. Urethane Casting with specialized chemical-resistant polyurethanes is recommended to accurately simulate Buna-N fluid compatibility.
- To Simulate Viton / FKM: For high-temperature, high-stress aerospace or automotive applications, additive methods fail. You must bypass plastic prototyping and utilize rapid compression molding with true FKM compounds to get accurate testing data.
Understanding Elastomeric Durometer Scales
Selecting the correct Shore A hardness is critical for functional rubber prototypes. Here is a baseline reference for mapping your design intent to real-world tactile properties:
- Shore 30A (Very Soft): Comparable to a soft rubber band or gel insoles. High elongation, highly compliant, but low tear resistance. Best for light-duty gaskets.
- Shore 50A – 60A (Medium Soft): Comparable to a pencil eraser or window seal. Ideal for flexible boots, weatherstripping, and bellows.
- Shore 70A (Medium Hard): The industry standard for car tires and traditional O-rings. Excellent balance of compression set resistance and structural integrity.
- Shore 90A+ (Hard Elastomer): Comparable to a shopping cart wheel or skateboard wheel. High impact resistance, low elongation, ideal for industrial bumpers, rollers, and drive belts.
Design Considerations for Molding Rubber Parts
When transitioning from additive prototypes to low-volume elastomeric production, prototype mold construction requires distinct DFM rules from those for rigid thermoplastics. Rubber tooling design must account for the high thermal expansion coefficients of elastomers and their low viscosity during vulcanization or casting.
Key Considerations for Prototype Mold Design
- Draft Angles: While rigid parts require generous draft angles, soft elastomers (typically under 50 Shore A) can often be demolded with minimal or even zero draft. This is because the material can safely stretch and deform around minor undercuts during manual or mechanical ejection.
- Flash Lines and Parting Lines: Elastomeric materials flash far more easily than rigid polymers. In prototype tooling, mating surfaces must be precision-machined to prevent flash, which can otherwise compromise the sealing integrity of a custom gasket or O-ring.
- Shrinkage Allowance: Rubber compounds exhibit significant volumetric shrinkage upon cooling. Prototype tool design must incorporate specific shrinkage factors—ranging from 1.5% to 4% depending on the polymer base—directly into the initial CAD cavity design to ensure final dimensional accuracy.
Essential DFM Rules for Flexible and Rubber Prototypes
Before submitting your CAD model to Fictiv’s instant quoting engine, ensure your design accounts for the unique physics of flexible polymers:
- Enlarge Corner Radii to Prevent Tearing: Elastomers are highly susceptible to stress concentration. Avoid sharp internal corners; adding a generous radius (minimum 0.060 inches) significantly reduces the risk of the prototype tearing under cyclic load.
- Maintain Uniform Wall Thickness: Thick cross-sections in cast or molded elastomers lead to localized shrinkage, voids, and sink marks. Aim for uniform wall thicknesses between 0.040 and 0.250 inches.
- Account for Seal Compression: If prototyping an industrial seal or custom gasket, design the groove to allow for 15% to 30% compression. Remember that rubber is incompressible by volume; it displaces rather than squeezes, so your design must provide gland volume for the material to expand into.
Choosing the Right Process for Your Prototype Parts
What process should you use to create your elastomer prototype? While of course that’s different for each design, the areas to look at remain the same: cost, production volume, required functionality, and hardness.
For low-cost prototypes, especially with lower strength or resolution requirements, SLS is a reasonable material choice. Very slightly more expensive, but with great resolution, PolyJet Tango makes parts with the right feel, even if they’re not as strong as production parts. Closer to production, but again slightly more expensive, is the PolyJet Agilus material, which gives broad choice in durometer and amazing elongation (more than 200% before breaking).

With the requirement of a master part, mold creation, and finally casting the prototype, cast urethane is a costly option, but it’s unparalleled if you’re looking to create many prototype parts. Milling is rarely recommended, but reasonable for low-detail parts in very hard rubbers.
For any of these processes, there are a number of durometer ranges that can be created, but listing properties makes for damn boring reading, so we’ve created a simple chart that illustrates the durometers at a glance:
| Prototyping Process | Primary Materials | Durometer Range | Optimal Application | Scalability to Production |
| Carbon DLS | EPU 40, EPU 41, SIL 30 | 40A – 70A | Functional testing, complex engineering lattices, high cyclic loading, and end-use elastomeric components. | High (Direct path to digital mass production without tooling). |
| PolyJet | Agilus30, Digital ABS / Elastomer blends | 30A – 95A | High-fidelity visual prototypes, multi-material overmolding simulation, and basic form-and-fit testing. | Low (Strictly restricted to early-stage prototyping phases). |
| Urethane Casting | Specialized Polyurethanes (simulating EPDM, NBR, Silicone) | 10A – 90D | Low-volume production runs (10 to 100+ parts), complex enclosures, and functional fluid-sealing gaskets. | Medium (Serves as an excellent bridge to hard injection molding tooling). |
| Rapid Compression Molding | Production Elastomers (Viton / FKM, EPDM, Silicone, Neoprene) | 40A – 90A | Strict environmental, chemical, and extreme thermal testing using the exact final production material specification. | High (Utilizes actual production manufacturing methods and tooling principles). |
Navigating the complexities of elastomeric prototyping—from managing durometer constraints to optimizing prototype mould design—ultimately serves a single purpose: accelerating your product’s time-to-market without compromising functional performance.
Whether your current development phase demands the rapid, tool-less throughput of Carbon DLS or the bridge-to-production scalability of precision urethane casting, matching the right process to your mechanical requirements is critical. Fictiv eliminates the sourcing friction. By pairing a vetted global manufacturing network with automated, intelligent DFM feedback, we help you deliver high-quality elastomeric parts on demand.
Create a free account and upload your CAD file to the Fictiv platform today to receive an instant online quote and expert design-for-manufacturing analysis.