Time to read: 8 min
Injection molding is the number one choice for producing most plastic parts that we encounter on a daily basis — and for some applications, it’s also a good choice for prototyping. The advantages of injection molding are legion, but this proven process can produce a large number of highly consistent parts in a relatively short period of time.
Today, plastic injection molding is nearly 150 years old. It’s come a long way since its beginnings, and most of its technological improvements have occurred in the last 75 years. In 1872, John and Isaiah Hyatt invented and patented the first injection molding machine. This equipment was simple, but it allowed for the molding of buttons, combs, and other plastic parts.
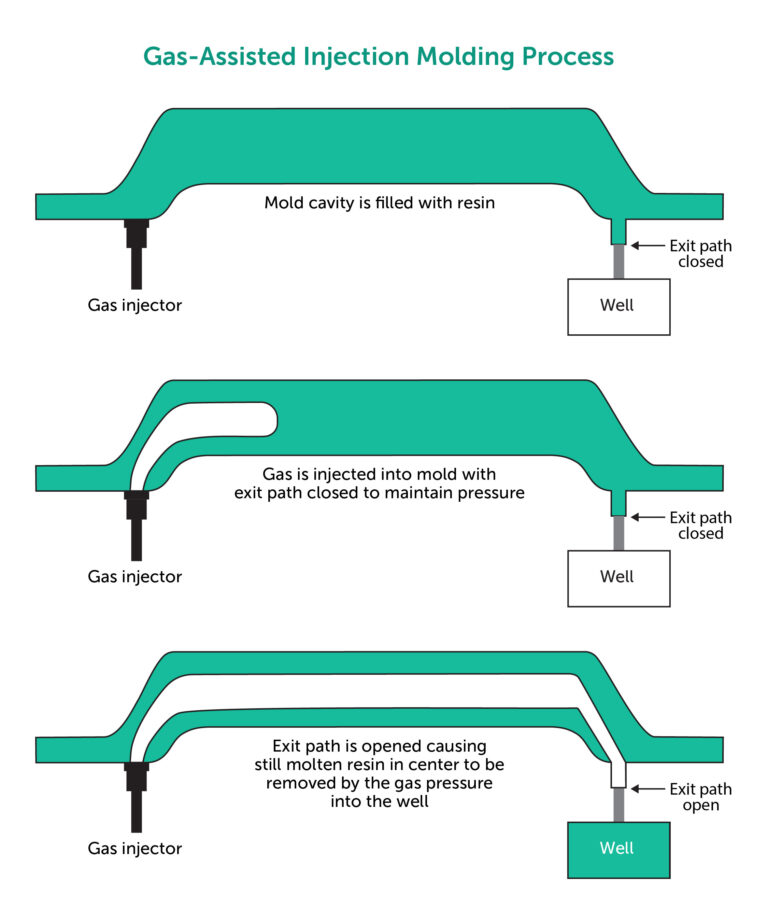
Injection molding’s biggest technological breakthroughs occurred in the late 1940s thanks to James Watson Hendry, who advanced the material delivery method with the first extrusion screw-fed injection mold machine. Hendry also invented processes for gas assisted molding and drove many other advancements in the field.
Thanks to these and other efforts, injection molding has become a ubiquitous part of our everyday lives. Now that we know the origins of the production process, the rest of this article explains what goes into a successful injection molding project. And for injection molded parts with complex geometries at ridiculous speeds, create a Fictiv account and upload your part drawing today.
The Injection Molding Process
Plastic injection molding is a multi-step process:
- Part design
- Mold design
- Mold creation
- Mold preparation
- Injection
- Cooling
- Ejection
- Post molding processing
The following sections provide an overview of each step.
Part Design
After an engineer or an inventor comes up with an idea for a new part, the next step is to create a part drawing that accounts for the manufacturing process that will be used to produce the part. For example, if a part will be injection molded, it needs to include certain features, like draft, so that the mold can separate and parts can be removed efficiently and consistently. By avoiding common design mistakes, you can achieve project success more easily.
Mold Design
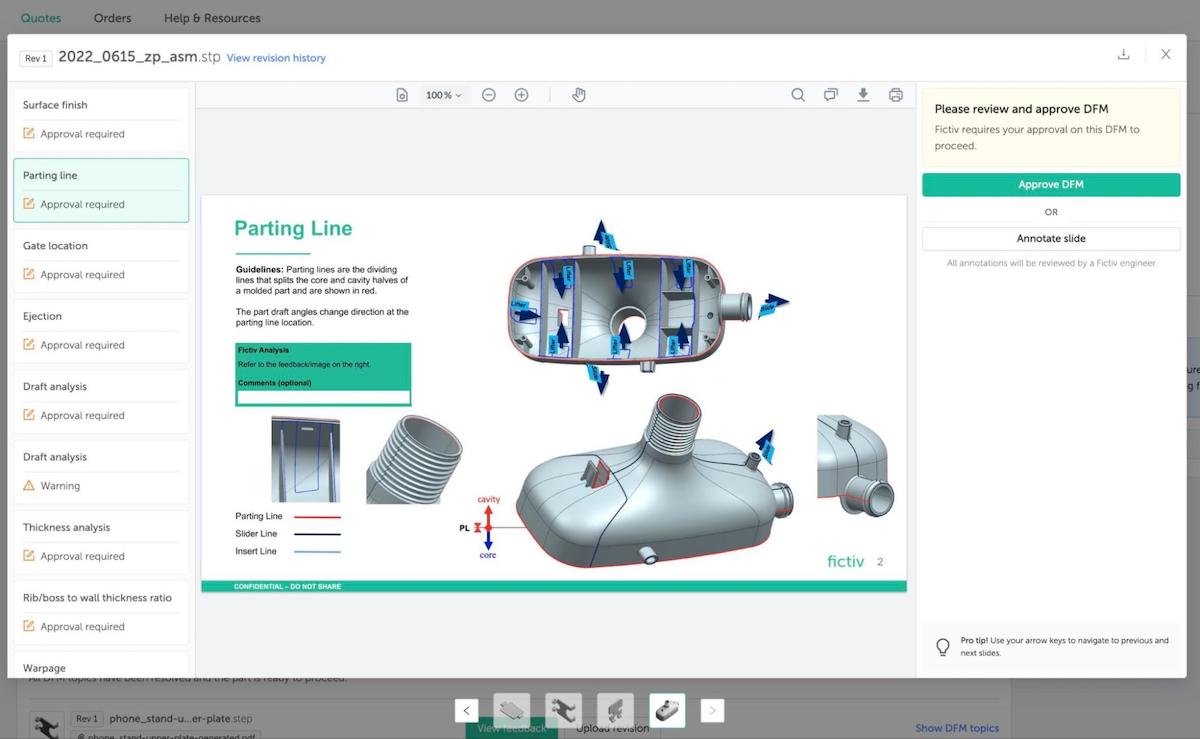
After the part design is complete, it’s time to design the mold’s negative cavity and other features. The mold designer considers what the part designer wants, but must also place various features to support injection molding, like the parting line location, which determines where the mold separates. Ejection determines how the part is pushed from the mold’s core, and gating determines how material will flow into and fill the cavity to produce the molded part.
In turn, these design recommendations and decisions are reviewed with the part designer in a process known as design for manufacturability (DFM). Once the part designer and the mold designer have agreed upon all of the features that the tool must have, the mold maker can begin the process of building the injection mold.
Mold Creation
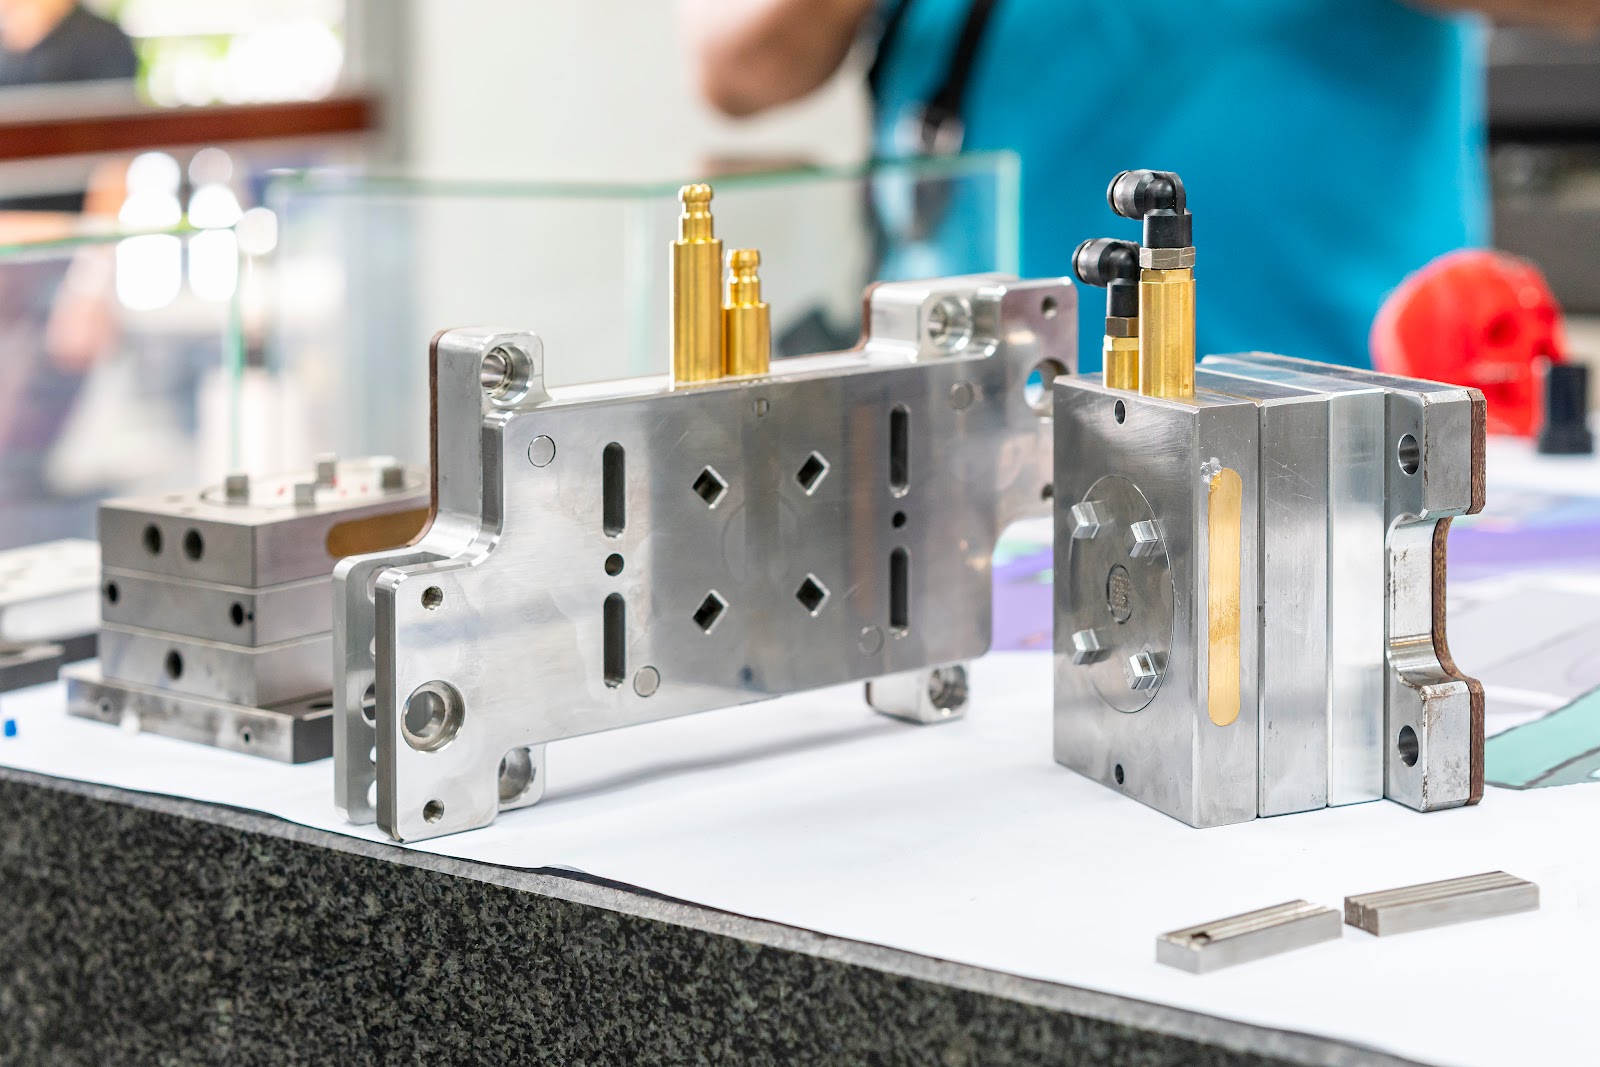
Injection molds can be made from aluminum or soft, semi-hardened, and hardened steels. To select the right material, mold makers consider production volumes, the type of plastic resin, and the physical characteristics of the final part. The tool is cut from solid metal using machining processes such as milling, lathe work, or electrical discharge machining (EDM).
Mold Preparation
When all of the mold’s components are complete, they’re assembled with the tool that will be used inside of the injection molding machine. Once this assembly is complete, a technician confirms that everything on the tooling lines up correctly and fits together tightly. Even a small amount of misalignment in the mold or any of its components can lead to failure.
The fitting process uses colorants to show areas of incorrect fit so that the tool maker can address them and fit them up again. Only after the mold maker is satisfied with the tooling is the mold put into the injection molding machine. Setup can take anywhere from a few minutes for simple, small tools or inserts to the better part of a day for tooling that requires heavy equipment or lifts to move into place.
Material Preparation
While the tooling is set up and tested, the plastic material is also prepared. The goal is to make sure that the plastic contains the correct moisture level and is heated properly so that it can be injected into the mold. Most injection moldable plastics are placed into a dryer to remove excess water and make the material easier to mold.
Once the plastic material has reached the correct moisture level, it’s fed into a hopper atop the injection molding machine. From there, plastic is continually fed into the melting stage of the injection molding machine.
As the material drops into the barrel of the machine, it is pushed toward the mold using a screw plunger. The barrel is lined with heating elements to bring the material up to temperature and the screw assists in turning the hard plastic pellets into molten plastic ready to be injected into the mold cavity.
Injection
Once the molding machine is ready and the plastic material is melted, the injection cycle begins. The mold is closed tightly and held shut by the high pressure of the mold press. The screw plunger pushes forward to extrude the material into the mold through a system of channels known as sprues, runners, and gates. These channels in the tooling deliver the material to the cavity of the injection mold until it’s filled completely.
Cooling
Once the injection molding shot is complete, the pressure on the material and the mold is held for a set period of time. This allows the molten plastic to begin to cool and solidify. Once the plastic reaches a cool enough temperature to maintain its shape and be pushed from the tooling, the two mold halves are pulled apart.
Ejection
Part ejection is the last stage of the molding process within the machine. During this stage, the molding machine pushes forward pins, blades, or other features. These features gently press one side of the injection molded part until it releases from the mold — then the mold can shut and the process can be repeated. Ejected parts can be dropped directly into a box, onto a conveyor, or retrieved by robot to be delivered to the next step in the process.
Post Molding Processing
Injection molded parts can often be packaged and shipped straight to the customer, but in some cases, secondary operations are needed to remove excess material through trimming. Parts also can be painted, pad printed, or screen printed for decoration, or may require the manual insertion of metal inserts for screw bosses or compression limiters. In cases where tighter tolerances or unusual features are required, parts may need to be machined or sonically welded before they are shipped.
Types of Injection Molding Machines
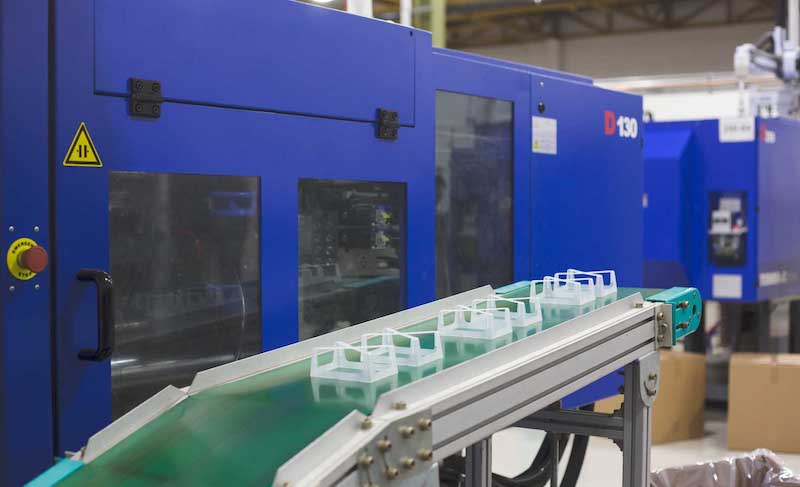
Three types of injection molding machines are common today: hydraulic, electric, and hybrid.
- Hydraulic injection molding machines use hydraulic pressure for clamping and injection. These machines have very high clamping pressures and are known for their robustness and durability.
- Electric injection molding machines use electricity and motors to provide the pressures and actions required for the injection molding cycle. These machines are very precise and are used often for parts that require an added level of precision.
- Hybrid injection molding machines use both hydraulic and electric systems to manage the mold cycle.
Injection Molding Materials
There are literally thousands of thermoplastics used in injection molding. Each has its own advantages and disadvantages, so it can be difficult to determine the material that you need. Typically, material suppliers help customers to select plastics, but Fictiv also helps with material selection and provides DFM guidance. You can also check out resource articles like Common Plastic Materials for Injection Molding.
Designing for Injection Molding
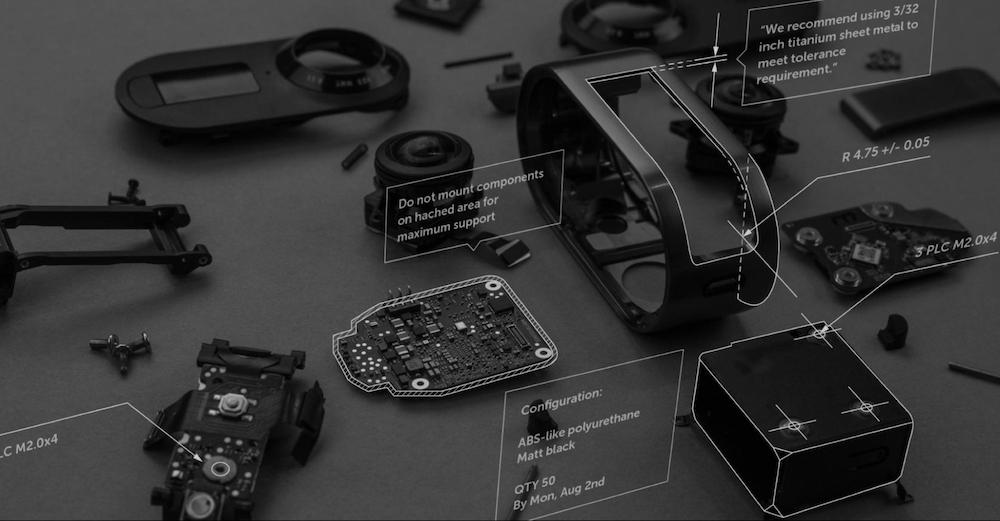
Although there’s a great deal of complexity in the injection molding process, there are some basic design principles to consider when designing injection molded parts. Draft angles, wall thickness, undercuts, and gates are all important.
Draft Angles
Designers add draft to the walls of injected molded parts so that the mold can open and parts can eject without difficulty or damage. They also add draft to areas of the part that cause the mold’s core and cavity to shut-off against each other. Typically, this extra draft is more than three degrees so that the mold halves shut-off without forming flash, plastic that leaks out between the core and the cavity and mars the surface of the part.
Wall Thickness
For each type of plastic, there’s an optimal wall thickness. Typically, wall thicknesses in injection molding are between 1 and 3.5 mm; however, they vary depending on material, part complexity, and size. Simpler parts can fall on the lower end of the recommended scale, but larger parts may need thicker walls to ensure that the plastic can flow through the entire design before freezing off — so additional plastic cannot flow into the cavity.
Undercuts
The greatest complicating factor in an injection mold is a part feature called an undercut. These recesses or protrusions prevent a part from being formed by just the core and the cavity. Without more complex (and expensive) tooling, these part features would become damaged. It’s not always possible to avoid undercuts, but it’s best to limit their use to only when necessary.
Gates
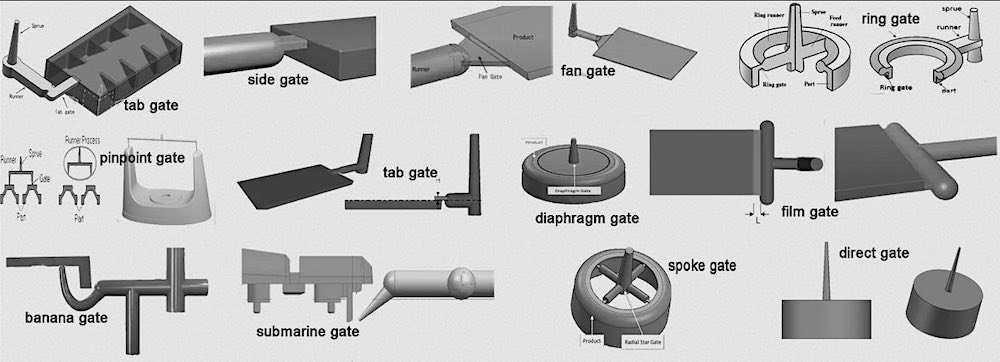
Finally, designers need to consider how the plastic material will flow into the part. This is known as the part’s gating plan. Because gates leave a small vestige of material, gating must be considered during part design. It’s best to gate the part where this leftover material will be the least obvious, while still providing proper filling during the molding cycle.
Advantages and Limitations of Injection Molding
There are many reasons to choose injection molding for plastic parts. For example, you can get large numbers of parts in a relatively short period of time. Plus, when you need a large volume of parts, injection molding is often the most economical way to produce them. Once a tool is set up and working properly, it will continue to make thousands (or even millions depending upon tooling material) of parts as long as the parameters or materials don’t change.
Some of the limitations to injection molding arise from the fact that complex parts can be very expensive to tool. If the volume of parts is low, then other processes (such as 3D printing or CNC machining) are more economical. Also, if a part design will change significantly over a short period of time, molding may require a whole new tool instead of a tooling update — which can add significant costs and extend project timelines.
From Injection Molding 101 to Injection Molding Done Right
Injection molding is a powerful manufacturing process that can produce a large number of parts quickly using a large number of thermoplastic materials. If you think your project is a good fit for plastic injection molding, now’s the time to find out.
Create your free Fictiv account and upload your part design to get started — our experts will guide you through the process and help you ensure your project is a success!


