Time to read: 9 min
To most people, plastics might seem all the same, but to an engineer, plastics come in families, have cousin materials, and have other materials that are as different as cats are from dogs. Of course, our clients expect us to worry about these details, and as nerds, the minute differences between materials, including considerations for CNC machining, are a source of fascination.
But even the nerdiest among us won’t have all the material properties memorized for many types of plastics (and if you do, then maybe you need to get out more), and not everyone who needs to select materials for a design has a technical background. And with new materials being released all the time, we need a way to look at the key material properties: This is where material data sheets become invaluable. So, how do you interpret these valuable references and choose the right material for your design?
Tensile Properties
Tensile strength is the most common measure of strength in materials and also the most likely number for the nerds in your life to have memorized, and for this reason, it appears at the top of most data sheets. For older engineers, such as all of our professors, any study of strength of materials used to focus on the tensile test for all the useful information it provided, especially in looking at metal properties. With polymers taking over in design, we need to perform other tests to get the same depth of information on plastic materials, but this remains the best starting point for deciding if a material is right for your application.
The tensile strength test is straightforward: A small piece of material is held between two clamps on a hydraulic press, and one of the clamps pulls on the material until it breaks. From this simple test, we can find the ultimate tensile strength (UTS—how much stress it can take when it breaks), the tensile strength at yield (how much stress the material can stand before it starts to deform permanently), the modulus of elasticity (also called Young’s Modulus, meaning how much it deforms under stress), and the elongation at yield (basically, how much it stretches before it snaps).
Oh, no! We can hear the yawns from here. What do these terms mean, and why should you care?

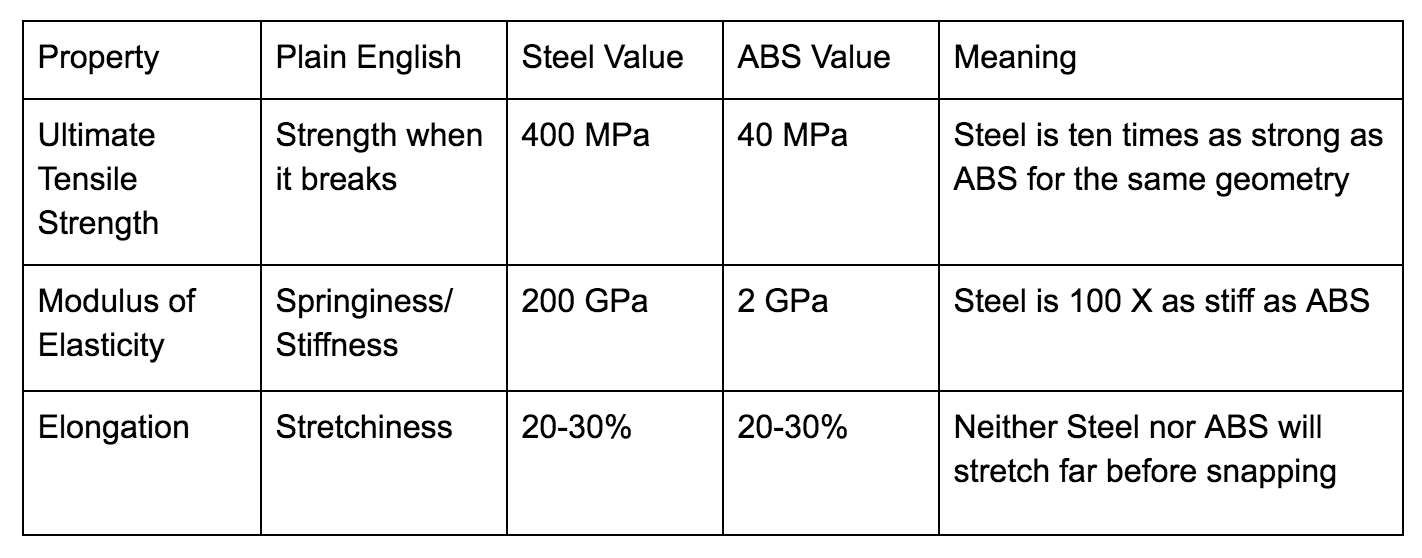
In their direct form, they give you an easy way to compare strength between materials. For instance: ABS is a nice strong plastic and has a UTS of 40 MPa. Steel is a nice strong metal and has a UTS of 400 MPa. Wow—steel is ten times as strong as ABS for the same size. I didn’t know that. (See! I’m not that nerdy!) Now, of course that doesn’t mean that you should abandon plastics for steel, but it does mean that parts of the same strength will need to be much thicker.
Similarly, the modulus of elasticity allows us to have an at-a-glance idea of how “springy” the material is, whether very stiff (steel – YM of around 200 GPa) or quite flexible (ABS —around 2 GPa), and the elongation at yield (or sometimes at break) will give you an idea of just how far you can pull the material before it becomes an issue (here steel and ABS compare well, with 20-30% for each, depending on the specific material). See? Useful. You should definitely keep a nerd around for interpreting these things.
Flexural Properties
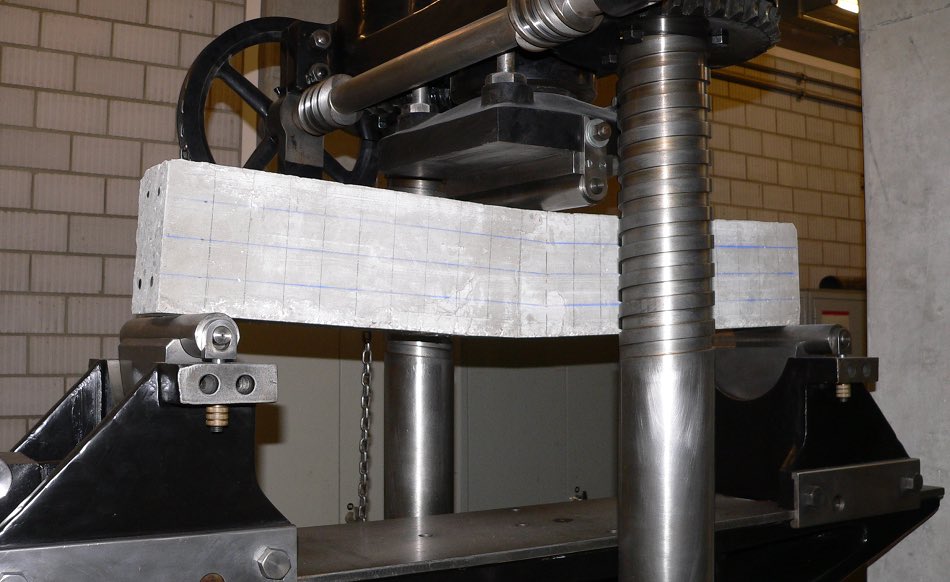
Flexural properties are similar to tensile properties, and in many materials can be approximated from the same measurement. However, for accuracy, especially in plastics, it’s best to perform a three-point flexural strength test, where a bar of the material is placed across two supports, with a hydraulic head pressing in the center, which gives us flexural strength and flexural modulus, which in homogenous materials are the same as the tensile strength and modulus, but…wait, wait, come back!
Let’s break that down a bit. Essentially, if a material is perfectly the same all the way through, the way most steel is, then the flexural test will give you the same numbers as the tensile test. But plastics are almost never the same throughout the cross section—because of injection molding, the material will form a skin of material that doesn’t match the rest of the material.
While that can occasionally be a bad thing, in some cases it works out really, really well, like in the case of rigid structural foam: The interior of the part is super lightweight (foam-like), while the outside skin is solid plastic (the skin), which results in lightweight, stiff parts. This material property allows for the construction of ladders, play equipment, and hand carts that are both cheap and lightweight.
But you should be careful, because these properties can also work to your disadvantage, such as when material surface roughness or surface imperfections result in a much lower flexural strength than tensile strength. This can happen with quite a few printed materials, like those produced with SLS or FDM. Keep in mind when prototyping with these materials that care should be taken when designing parts that flex.
Impact Properties
Many of us think ourselves to be Titanic experts (or at least, Leonardo DiCaprio experts), but here’s a lesser-known fact: If the Titanic had been hit by similar impact of a rock in the tropics instead of an iceberg in the Arctic, it may not have sunk. Why? Impact strength.
Steel is exceptionally strong (see tensile numbers above), but at low temperatures, it becomes very brittle, and so force that would bounce off a steel plate in warm weather, or at worst dent it, will cause the sinking of an ocean liner at colder temperatures (and give millions of teenage girls the best movie experience of their lives 86 years later). Luckily, we’ve since been more careful about measuring the impact strength of materials before using them in our designs.
This test, like the other mechanical tests, is beautifully simple: The sample is secured in a clamp beneath a heavy pendulum arm, the arm is raised, and then the arm swings down and breaks the sample. (Not just educational, but fun.)

The tests are done on either notched or unnotched samples. A notched test is a realistic indicator of impact strength when there may be some flaws on the surface of the product (an iPhone case gets tossed into a pocket with some keys, and flaws are bound to result), while an unnotched test is better for situations where the material will be in less demanding environments.
In either case, the impact properties of plastics are especially interesting, as we so often want to know not necessarily how strong something is, but how it’s going to hold up when in an accident or dropped off a table. (Or balcony, which as I swore to my girlfriend, was an accident. Incidentally, hard case or no, iPhone aren’t good after a three-story fall. Boyfriends, beware.) Take two common clear plastics: polycarbonate and acrylic. They both have similar tensile strength (around 40 MPa), but polycarbonate withstand up to 40 times as much impact. Acrylic may make for very nice clear lenses, but it’s clear which is better for safety glasses.
Thermal Properties
In the same way you have to worry about materials becoming brittle when it’s cold, or snapping when a load is sudden instead of gradual, for some applications, you’ll also need to think about what happens when it’s really hot. You know what I mean if you ever came back to the car from shopping with your parents to find that the car had melted your favorite Barbie.
While this is less of a concern for metals, plastic properties dictate that for the most part, when they get hot, they get soft. Fortunately, this is covered on material data sheets, too, under the thermal properties section, where you’ll typically find several notes on heat deflection temperature, and sometimes a glass transition temperature.
Heat deflection is straightforward: The testing will show you at what temperature the material begins to deflect at what stress. Find a pressure similar to the stress you’ll need in your design, and then check to make sure that the temperature where deflection happens is well outside your planned use. Easy.

Glass transition is a little more complicated, and only applies to amorphous materials: materials that don’t have a crystalline structure (such as polycarbonate and polystyrene, as opposed to crystalline polymers like nylon and polypropylene). Basically, when an amorphous material gets warm, it goes from being brittle to being rubbery, and that happens at the glass transition temperature.
You’ll have to care about this for two reasons: You don’t want your rubbery parts to become brittle, and you don’t want your hard parts to become rubbery. For instance, if tire rubber gets much below minus 100 F, you have to worry about shattering it; if ABS is heated above 220 F, it starts to behave like flubber (minus the dancing). And speaking of rubbery materials…
Hardness
Even though from a chemical engineer’s perspective elastomers (rubbers) and plastic polymers are essentially the same, everyone knows that on a practical level, they’re just not the same, and we learn this from the time we develop a taste for pacifiers. Though stretch (remember elongation at break/yield) and elastic modulus are very different, for most people, the biggest difference in classification comes down to hardness.
The hardness test for materials is fortunately simple, consisting of a small ball-ended or cone-ended rod pressing into the material with a specific force. If it barely presses into the material, it gets a high hardness number; if it presses in far, it gets a low hardness number. Unfortunately, because we have to measure hardness of everything from rubber bands to diamonds, the scales we use for these measurements are anything but simple, with two common scales (Rockwell and Shore), which each have several subcategories, as well as some less common scales (Vickers, Leeb and Brinell, which we will completely ignore from here on).
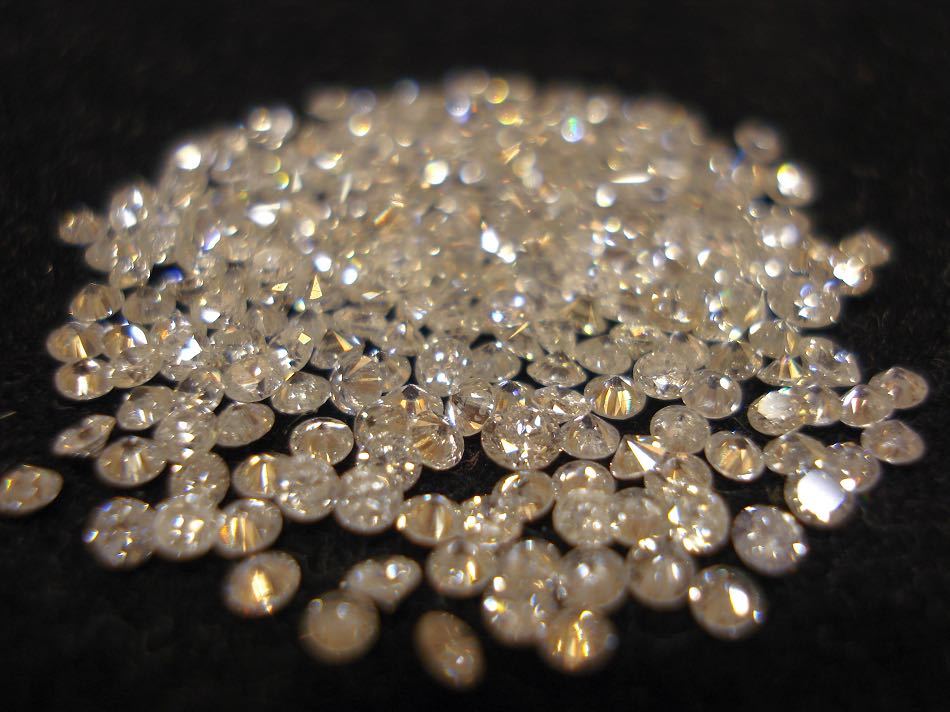
Rockwell is the scale used for measuring hard things, from hard plastics (like nylon and polycarbonate) to gemstones. For plastics, the most common scales are Rockwell E, Rockwell R and Rockwell M; polycarbonate has a hardness of about Rockwell 70M.
When measuring soft things, like rubbers and soft plastics, we use the Shore scale (which also has many letters after it to add to the confusion), and we most often use either the Shore A scale (very soft—rubber bands are Shore A 20 and car tires Shore A 60) or the Shore D scale (firm to hard—a hard hat is Shore D 80).
A true nerd would want to dive further into the details of the history of the different scales and how to use the Shore OO scale, and if that’s you, well, then you should really find another source. Or maybe another hobby. For everyone else, check out our article on prototyping soft materials and elastomers, and our free downloadable chart that shows the hardness of different materials on both Shore A and Shore D scales.
Limitations to Material Data Sheets
As with every type of technical data, material data sheets have their limitations. You’ll typically find all the information listed above and commonly find extra information (like density), but some information always requires further digging.
For instance, when you’re designing food products, you’ll need to look at the FDA guidelines and also look for information from the manufacturer as to whether or not the planned material is food safe. In addition, you’ll need Material Safety Data Sheets (MSDS) to look at health hazards. Similarly, if the material will come into contact with other materials, you’ll need to find out how the properties will be altered; it’s very common for the outgassing of certain adhesives to cause brittle cracking in acrylics and polycarbonates, for example. Material data sheets are a great starting point for choosing a material, but the journey shouldn’t end there—keep digging until you’re confident in your material choice.
Using Material Data Sheets for Your Design
Material data sheets provide an amazing amount of information at a glance, but as with all types of engineering knowledge, it takes background knowledge on what the numbers mean to interpret that data and a good engineer to evaluate the properties and choose the right material for a design.
Want to learn more about specific materials to use in your upcoming prototype? Check out our material data sheets for CNC machining, 3D printing, and Urethane Casting. And want more engineering knowledge coming your way every week? Be sure to sign up here for more articles!


